Nestled in the very back corner of Animal Kingdom with a small, completely missable sign and no fancy building to speak of, it was really easy to pass right by it.  In fact, I remember the first time I went there in September of 2011, it was the only character dining experience I could find on short notice (except for something with Agent Oso at Hollywood Studios...  And that wasn't happening).  I booked my reservation begrudgingly, expecting nothing, and not really looking forward to eating there.  The African themed breakfast was a turn off, Animal Kingdom isn't my favorite park, and if it wasn't for my compulsive need for character dining during a Disney trip, I'd have skipped it all together.  I kept telling myself "at least it has Mickey Waffles."  I expected nothing but utter disappointment in this little restaurant I'd never heard of, that nobody wanted to eat at (why else would I be able to get a reservation two weeks before my trip?), in a park I didn't typically spend a whole day in...

Then I ate there...  And Tusker House instantly went from place I was going to eat at because it had food and characters to a favorite dining experience that was not to be missed.  The weird location in the tucked-away corner of what is arguably Disney's least-favored park and poor signage made this an often overlooked hidden gem, not just at Animal Kingdom, but among all of the character dining experiences.  Featuring Donald, Daisy, Mickey, and Pluto in their safari-finest, this is a very fun, family-focused character meal that I've been to time and time again, both on adults-only trips and family trips with small children.

The check-in process for Tusker can be very lengthy and somewhat confusing, so be sure to arrive there at least 15 minutes before your reservation opens.  Remember, it is in the back of the park and it does take quite the walk to get there from the front gate of Animal Kingdom...
 Once you've arrived, check in with the hostess outside and you will (eventually) be escorted behind the building to take your souvenir picture (remember, PhotoPass Photographers sometimes use your camera too!  If you don't have PhotoPass+ which entitles you to this picture at no charge, hand the photographer your camera too... They may decline, but they may not!) and then into the buffet hall off of which are two dining rooms.  The dining rooms are fairly large, have lots of tables in them (almost bordering on overcrowded), and can be very loud especially as it starts to fill up or during the occasional character/kid parade (the characters lead kids with loud musical instruments in a parade through the dining room...  Cute, but again quite loud and obtrusive...  Who's bright idea was it for the kids to use maracas and tambourines anyway?).    The decor is fantastic...  It reminds me of a train station, only instead of waiting for the train, you're waiting for the safari.  Lots of African-styled props, pictures, and other decor adorn almost every flat surface and wall.  My favorite feature has to be the carpet-draped ceiling which both reminds me of Africa and the beginning to "Aladdin."


As Donald is the host of the breakfast, it goes without saying that he is there to meet and interact with.  He used to be located outside-only as the character you take your souvenir photo with, however the last two times I ate there he had been "promoted" to the dining room and now comes to your table like the rest of the characters.  Along with him is Mickey, Daisy, and Goofy, though occasionally Goofy rotates out in favor of Pluto while Daisy is very rarely replaced with Minnie.  The characters rotate around the separate dining rooms and visit each table for what are actually pretty lengthy interactions.  They will pose for pictures, sign autographs, and engage in that fun horseplay that you'd expect from Donald and the gang.  In fact, one year Goofy walked off with my plate and Mickey pushed my husband out of his chair and sat with me for breakfast.  Things can get pretty wild!  Because they cycle through two dining rooms and have a Cast Member escort who'll give you a heads up when a character is approaching your table, there is still plenty of time to visit the buffet and grab copious amounts of food.  Want a family picture with your favorite character?  See if the Cast Member escort will take a picture for you...  They are usually very happy to do so!

Aside from the coffee, tea, soda, water offerings one would expect, Tusker House serves a specialty juice called "Jungle Juice."  A combination of orange, guava, and passion fruit juice, this stuff is almost worth the price of dinner by itself.  I love, love, love, love this juice and it's my favorite non-alcoholic drink on property.  My brother, who's been to exotic locations like Fiji and Dominica says it reminds him of the drinks they had there with meals.  Your experience at Tusker House isn't complete unless you at least try it.

But really, let's get to the nitty gritty...  The food.  The food selection and quality here is, I think, one of the best of its kind in the parks.  Despite the African theme, everything you could ever imagine is available and even the pickiest eater is sure to find something there.  Safer options include the basics: bacon, sausage, scrambled eggs, quite a bakery spread which include donuts, danishes, banana bread, muffins, as well as a wide assortment of whole and cut fruit, and of course, Mickey waffles.  Warm offerings include sausage gravy and biscuits, oven roasted gold potatoes (both my favorites), various frittatas, and carved rotisserie ham.

Among all of those safe, dare I say universally liked options, there are some signature dishes that are nothing short of delicious on their own.  Mealie pap is one of the most talked-about and certainly one of the most popular.  A mix between porridge and corn casserole, sweet but still salty, and judging by the fact almost everybody had at least a spoonful on their plate, a safe option for picky eaters who want to safely wander out of their comfort zone.  Admittedly it's not my favorite, but considering it's one of my most requested and viewed recipes, I'm clearly in the minority.  I personally fell in love with the banana bread bread pudding with vanilla sauce.  I'm almost embarrassed to say how much of it I have to have eaten in my life.  Decadently sweet, moist, with bits of toasty crunch...  Its pretty much the perfect breakfast food and something I still dream about.  The beef bobotie quiche is another very popular signature dish...  But I've yet to try it.  Every time I've gone up, they've been between batches.  I guess that speaks to both how popular, and how good, it really is.

Really, I can't talk about the food at Tusker without having my tummy do a happy-dance.  It's just
so ridiculously good.  Having eaten there in September 2011, January 2012, October 2012, January 2013, and February 2014, I can safely say it's my favorite breakfast and they have maintained the fantastic experience I've come to expect over the years.  The only change I've noticed is that while it once was a hidden gem that was very easy to walk into a reservation for, it has now become increasingly difficult to get reservations and it often fills up during peak season at the 180 day reservation mark.  My last trip, it was the first non-princess character experience to be completely booked months beforehand.

For people who like advantageous dining reservations which help maximize park time and minimize waits, Tusker House is one of the best choices out there for getting a jump on the day.  Located a stone's throw from Kilimanjaro Safaris, one could eat there at 8 and still be out in time to catch one of the first safari jeeps for the day when the park officially opens, saving a time and a Fastpass+ reservation.  We regularly took the first reservation of the day at Tusker, popped out shortly after the park opened to do the safari, then walked onto Everest and Kali River Rapids multiple times...  Though I suggest that for people who have only the strongest of stomachs (yes, a lesson I learned the hard way).

I love Tusker House...  It is the highlight of the character dining experiences at Walt Disney World and a fantastic way to immerse yourself in the richness that is Animal Kingdom.


No, that richness doesn't include my son's Ninja underwear peaking out while riding my husband's shoulders.  Lucky for everybody, I think.

Potatoes, Fritatata, Bacon

Hand-carved Ham


I shared this recipe during my first video last week and I know I'm a bit late with the written followup, but hey, better late than never, right?

I'm sure most people who're on Pinterest have seen this recipe...  It one of the most pinned recipes of 2012 and 2014 and it claims to be the recipe for the best cornbread out there.  And what makes this recipe ridiculously unique is that it involves the use of golden butter yellow cake mix.  Now, I'm not sure if this recipe is truly a genuine Disneyland recipe (I can't find information online confirming it is or isn't used at Disneyland, I've got several recipes from Disneyland that don't use cake mix), because it's so popular, so widely shared, and because I had all the ingredients in my pantry, I figured "why not?"

This recipe couldn't be any easier.  Basically, you make the cornbread and the cake mix in separate bowls according to the package directions, combine the batters, then bake.  Seriously, that's it.  How easy is that?

"Authentic" Disney recipe or not, this cornbread is phenomenal.  Mixing it all together made my kitchen smell like a birthday party...  So delicious.  Then baking it?  Yankee Candle needs to come to my house, smell how amazing it smells, then make a candle.  This amazing combination of butter and warm cornbread.  The cornbread itself...  Oh...  My...  Goodness.  Incredible.  Absolutely spectacular.  For sure my go-to cornbread recipe from now on.  It's moist, soft, flavorful, and it melts in the mouth like butter.  It doesn't crumble and, unlike a lot of cornbread recipes I've used, it doesn't crumble to bits when you cut it.  Thank goodness this recipe makes a ton of cornbread because less than 10 minutes after pulling it out of the oven more than half of the first loaf I made was gone.

While researching this recipe, I found a lot of suggestions saying that when picking the cake mix that the mix without pudding in the mix works the best.  I ended up getting a mix with the pudding in it because I couldn't find anything else.  Apparently it makes the cornbread too sweet, too cake-like with its flavors.  Personally, I didn't find it to have the taste or texture of cake and I didn't think it was too sweet at all.  That said, for those who may want a more savory version, see if you can find the Jiffy Yellow Cake Mix and use that instead (if using the Jiffy Yellow Cake Mix, use one box of cornbread mix to one box of the yellow cake mix as opposed to two boxes as directed below).

This cornbread is incredible.  I consider myself a cornbread connoisseur (it's one of my favorite carbs)...  If I see it in a menu, I order it.  I make it all the time.  And this version of cornbread is hands-down my favorite.  I'm already thinking about when I can make it again.

For those interested in watching how I make this recipe I did make a video, the first of what I hope are many upcoming webisodes for the website!


~~~~  °o°  ~~~~

Disneyland's Famous Cornbread
As is supposedly served in Disneyland
 
°o°  2 boxes of Jiffy Cornbread Mix
°o°  Ingredients listed on the back of the boxes to prepare EACH BOX of cornbread as directed 
°o°  1 box of Yellow Butter Cake Mix  
°o°  Ingredients listed on the back of the box to prepare cake as directed  
Preheat oven to 350 degrees.

Prepare the Jiffy Cornbread Mix as directed (since two boxes are being used, prepare each as
directed, essentially doubling the recipe).  Combine ingredients but under mix the batter slightly.  Set aside.

In a separate bowl, prepare the Yellow Butter Cake Mix as directed, undermixing the batter slightly.  Combine the prepared cornbread batter with the prepared cake batter and mix thoroughly while being careful to not overmix.  Pour into greased 9x13 pan (or loaf pans, but fill only slightly over halfway...  This rises considerably!) and bake for 30-35 minutes or until bread is golden, springs slightly to the touch, and a wooden stake inserted in the center comes out clean.

Cool slightly before removing from the pan and cutting.


~~~~  °o°  ~~~~

When I was younger, my world was divided into two categories...  Food I could eat while wearing braces and food I couldn't.

Beijing-Style Candied Strawberries?  They would have been in the "who are you kidding, you shouldn't even dream about eating them" category.

Introduced during the 2013 EPCOT International Flower and Garden Festival, these amazing treats quick became one of the signature snacks available at the many kiosks around the World Showcase.  What's not to love? Crunchy candy shell, sweet, juicy, fresh strawberries...  I couldn't wait to get my hands on these.  I had read the reviews beforehand, I knew that some people found them too sweet, some found them too hard to eat, others weren't a fan of the sesame seeds (by the time I hit the festival, the last weekend it was running in 2013, they actually had a version without seeds and I believe they carried this on to 2014 as well), but I didn't care.  I knew I'd like them.  Not just like, I'd love them.

And I was right.

When I ordered mine, I felt like a kid dancing in front candy counter because I was just so excited.  I watched them pull the skewer out of the fridge, I about died...  I had no idea they were cold!  It was almost 95 degrees out, deadly humidity, sun beating down on us...  They really were the most perfect snack ever!  That first bite was absolute heaven.  Those sweet strawberries and gooey, crunchy candy shell was perfect. I didn't even care that my teeth were sticking together and somewhere in New Hampshire my dentist was crying.  It was totally worth it.

Making these at home isn't exactly difficult, but it is really touchy.  If the strawberries are too wet,
the shell doesn't stick.  If the strawberries are over-ripe, when they hit the hot liquid, they bleed and the shell doesn't stick.  I learned that if it's too humid, the shell won't set up right.  If the liquid boils it too long, the shell gets too hard.  If it boils not long enough, the shell never gets crunchy.  Dip too fast, there's no shell.  Dip too slow, it'll break your teeth to take a bite.  It's crazy how perfect conditions have to be in order for this to be as perfect as it is in EPCOT.  The final product is so good, it's worth giving it a shot.

I made this two ways, first the way that it's served in EPCOT with 3 strawberries on a skewer, the second I dipped individual strawberries.  Dipping each strawberry individually for sure got the best results.  Maybe it's because the stakes I used were too thin, but the strawberries just kept falling off and they weren't getting the coating I like.  I also found individual strawberries to be easier to eat and there was far less bleeding, which meant the crunchy coating stayed put.  In the end, it's all personal preference...  Without the blast chillers that Disney uses, I think doing the three-per-stake technique they use at EPCOT is too tricky and doing one strawberry at a time gives a candied strawberry that more closely tastes like the final product they serve at EPCOT.


I didn't make any changes to this recipe, though I did do the sesame seed-free version.  Believe it or not, having the sesame seed version at EPCOT made me realize that, outside of hamburger buns, I'm just not a big fan of sesame seeds.  Who knew?

As for how to eat these, the debate rages on.  Some bite right into them, some people lick the candy coating off.  Me, I prefer the Tootsie Pop method...  Three licks and then a bite, because I can't wait to get to the strawberry.


~~~~  °o°  ~~~~

Beijing-Style Candied Strawberries
As is served at Lotus House, China Pavilion, EPCOT
 

°o°  1 cup granulated sugar

°o°  1/2 cup water  
°o°  2 tablespoons corn syrup  
°o°  2 tablespoons balsamic vinegar  
°o°  sesame seeds (optional)  

Wash and dry strawberries.  Set aside until ready for dipping.

Add sugar, water, corn syrup, and balsamic vinegar into a large saucepan over medium-high heat.  Stir until the sugar has dissolved.

Continue to cook over medium or medium high heat without stirring until a candy thermometer reads 300 degrees and the liquid is an amber color and reduced by slightly more than half, about 20 minutes (watch for boil overs!).  Remove from heat and allow bubbles and foam to reduce, showing the liquid, about 2 minutes.  If desired, add sesame seeds.

Working quickly, dip strawberries in the sugar mixture, allowing excess to run off the tip of the strawberry.  Turn strawberry several times to ensure even coating and distribution of candy shell.  Place on wax paper or lightly greased aluminum foil.  Place strawberries in a freezer for 15 minutes so that the coating sets, then transfer to a covered container in the fridge for storage.

Serve directly from the fridge to prevent sweating and ensure the coating stays crunchy.     


~~~~  °o°  ~~~~


 When I hear somebody mention Minnie's Bakeshop Cookies, my mind fills with a thousand memories from Walt Disney World.  I think of the Pop Century food court, walking past racks stuffed with these massive cookies, resisting the urge to grab a package or two.  I remember the horror of realizing I had leftover snack credits at The Polynesian Village and grabbing an armload of these red and white packaged cookies to take home.  I remember coming home after an adults-only trip and handing out packages to the kids and hearing the sound of the plastic crinkling and crunching as they held their baked treasures like gold with huge smiles.  Believe it or not, I actually have a cookie that I "forgot" about in the luggage, that had just expired and wasn't edible...  So I put it with my Disney memorabilia.  Yes, I have a hockey puck-like wrapped cookie that expired in 2011 displayed right next to Mickey ears in my bedroom.

And it'll probably make more than a couple of people laugh when they hear that despite all the memories I have of these monstrous, quarter pound cookies, and how completely tied to Disney they are in my mind, I think I've eaten only one.  What can I say? I'm not really a cookie person.

I'm sorry if I'm ruining anybody's illusion but these cookies, despite the name, aren't actually made by Minnie.  They're not even made on-site.  They're bought in by a company called Selma's Cookes, Selma also providing baked goods to everybody from Barnes and Noble and BAM to Gloria Jean's Coffee.  In fact, my son's first cookie ever was a Selma's Cookie...  A Snickerdoodle bought at Borders Books.  Anyway, they have a ton of flavors, everything from Chocolate Supreme (which has like 4 different types of chocolate chips), Oatmeal Raisin, and occasionally even an M&M one can be found out and about in Disney World.  And lucky for us, they were nice enough to make available a recipe for their "mix-in" cookies (the cookies they add things to) as well as their Snickerdoodles.  The recipe I'm sharing is their at-home version of their popular Raspberry White Chocolate Cookies. 

Yes, that does taste as amazing as it sounds.

While these cookies aren't hard to make, they do require a lot more babysitting and knowledge of how your oven works in order for them to turn out correctly.  For example, the recipe calls for 2 minutes at 400 degrees, 15 at 350...  Well, my oven (which is older than my kitchen...  Not even joking) can't do that.  It hits 400, it's going to stay at 400.  After a first batch that was far-from-perfect, I figured out that what worked best for my oven was 4 minutes at 400, 10-12 minutes between 325 and 350.  So as I said, prepare to watch the first batch or two like a hawk to make sure it cooks right.

Now...  Size...  The recipe calls for 1/2 cup raw dough per cookie.  Well, I did that, I got
hubcap sized cookies.  When I aimed for a happy medium of between 1/4 and 1/3 cup dough per cookie, I got a cookie more about the size of what Minnie ships out from her oven.  The key is to make sure they're really mounded, appropriately chilled, and you'll get a big, thick cookie.

The fun thing about these cookies is, fresh out of the oven, they're these soft, velvety, gooey cookies with the texture of butter.  They almost melt in your mouth the second they hit your tongue.  While pretty much the best tasting cookies of all time, they were definitely more chewy than the Minnie's Bakeshop version.  However, after being left to cool overnight (wrapped, of course), these cookies became a dead ringer for Minnie's Bakeshop Cookies.  Dense, not too chewy and not too crunchy, with a little bit of crumble, while still keeping the soft texture.  Personally, I like my cookies with crunch so I know this is sacrilegious to say, but I think these cookies are best enjoyed completely cooled.  For anybody who has the patience to wait that long, I promise...  You'll end up with a cookie so close to the in-park version of the cookie, you'll have family members digging through the trash to try and find the Minnie's Bakeshop wrappers. 

I did make two changes to this recipe, aside from the baking time and size notes above.  Because I live in rural NH and apparently white chocolate chunk chips are completely foreign to our grocery stores, I did substitute the white chocolate chunks for white chocolate chips.  Frankly, I prefer chunks but what are you going to do.  Secondly, I used seedless raspberry preserves.  I know that's what the recipe calls for below, however, that's not what Selma's uses.  Their swirl is something proprietary (for those who don't watch "Shark Tank" that is a fancy word for "it's a secret"), so the raspberry preserves is the suggested replacement.  Try to stick with seedless and if you use jam, be prepared to tweak the amount a bit.  You want enough of a swirl that you can taste the raspberry, but not so much it makes your cookies watery.  A lot of knowing how much to add has to do with how the dough looks since he portion is done by ounces.  Just make sure that you add and swirl enough that you can see the swirl, but not so much that the dough isn't firm and could be rolled into a sticky ball.  It shouldn't be crumbly, watery, or liquid.  Be aware...  These cookies can get pretty sticky, even after they're baked.  But as we all know, the messier the cookie, the better.


~~~~  °o°  ~~~~

Minnie's Bakeshop Cookies - Raspberry White Chocolate
As is found at Walt Disney World, Disneyland, and associated resort hotels and gift shops
 
°o°  1 cup butter, room temperature, sliced by tablespoon (to aid in mixing)
°o°  1 cup light brown sugar, packed
°o°  3/4 cup confectioner sugar (this cannot be substituted for granulated sugar)

°o°  1 egg
°o°  1 tablespoon water
°o°  1 teaspoon vanilla extract
°o°  1 teaspoon raspberry extract
°o°  2 3/4 cups flour (up to 3 cups if consistency is still to wet)
°o°  1 teaspoon salt
°o°  1/2 teaspoon baking powder
°o°  1 cup white chocolate chunks
°o°  1 cup raspberry flavored chocolate baking chips, semi-sweet (regular semi-sweet can be substituted)
°o°  10 ounces seedless raspberry preserves
 
Combine butter, sugars into large mixing bowl and beat until creamy.  Add egg, water, and extracts.  Continue to cream until all of the liquid is absorbed into the dough.  Slowly add flour, 1/2 cup at a time.  If, after 2 3/4 cups of flour, dough is still too soft to handle, add up to 1/4 cup additional flour.  Dough should be very dense and stiff, but not dry or crumbly.  Add white and chocolate chips, mixing to distribute evenly in the dough.  Divide dough into 4 batches.

Working with one batch of dough at a time (refrigerating the dough not being worked with) add about 2 ounces of raspberry preserves to the dough and cut the preserves into the dough to create a swirl.  Do not mix the dough or the swirl effect will not be achieved and cookies will turn pink.  Using a measuring cup or ice cream scoop, scoop dough into balls and place on a plate.  Put cookies in freezer and freeze for 15-25 minutes.  This will allow the cookies to bake without spreading.

Preheat oven to 400 degrees.

After 15-25 minutes in the freezer, place cookies on a parchment or foil-lined baking sheet (if using foil, grease pan generously).  Bake cookies at 400 degrees for 2 minutes.  After two minutes, lower temperature to 350 and bake for 14-17 minutes or until done.  Remove cookies from oven, allow to cool on pan for 10 minutes before transferring to a wire rack to cool for another 15-30 minutes.

Repeat process with remaining portions of dough.

Makes between 12-14 cookies.


~~~~  °o°  ~~~~
Today's recipe is something of a milestone...  Believe it or not, this is,  hands down, without a doubt the recipe I get the most requests for.  Seriously.  More than Dole Whips, Le Cellier Soup, and The Grey Stuff combined.  Literally, there was a point where I was getting a request for the recipe to these simple little cookies once or twice a week.  Even as I type this, I check my inbox on Facebook to see not one, but two more requests from fans for these cookies  I can't explain it
I'll admit, for a period of time I thought these requests were from the same couple of people (most likely related to The Cookie Monster in some way) made over and over and over again, but a quick little search on Google shows that these bad boys are the center of many a recipe request online, from Yahoo! Answers to Facebook and Disney food-related websites.  For some reason, these little cookies have quite the cult following.

So why didn't I share the recipe before now?  Well, quite simply...  I didn't have it.  And despite all claims to the contrary, very few had what could be nailed down as the legitimate, one-and-only famous Disney Snickerdoodle recipe.  Again you may ask why...  The reasons, as best I could uncover anyway, was because for the longest time the cookies were not made by Disney.  They were brought in pre-made and pre-cooked (or pre-made but frozen for quick baking) from an outside vendor.  I know this is an earth-shattering revelation for many, but it's true.  Even at places where you could find them on a rack, safely tucked on wax paper behind the sparking glass of the bakery display case, the chances were high that sweet looking little cookie was made somewhere other than Minnie's on-site bake shop.

Then sometime in the last 10ish years, Disney switched back to making these on-site again
(in limited batches, available only in certain spots).  But when it came to handing out the recipe, there were still roadblocks to overcome.  The measurements they used were designed for batch sizes in the hundreds.  As one can imagine, condensing down a recipe that makes 500+ cookies to a more household chef-friendly batch of 24 presents specific challenges.

After developing a "sorry, I don't have the recipe for Disneyland's Snickerdoodles" form letter (again, not joking), I kind of gave up the idea of ever nailing down this treat.  Such is the way with many Disney baked goods...  The home chef version of the recipe was just not meant to be.

Then, a breakthrough.  I was looking for an email that I thought landed in my SPAM box and I just happened to find a message from Disney Guest Relations.  Inside, the practically perfect and ridiculously pleasant response by one of the fantastic folks at Disney, happily sharing Disneyland's Snickerdoodle recipe.  Um.... Whaaaat?  I didn't even remember sending the email that asked for the recipe.  I was stunned, but thrilled.  Oh and by the way, the email they replied to was sent 6/28/2012.  That's right, they replied to an email I sent two years ago asking for this recipe.  Am I the only one who thinks that's amazing?

After getting this recipe from Disney, a recipe people have been asking me about for years, an easy recipe with no exotic or expensive ingredients, a recipe that happens to be my son's favorite type of cookie, you'd think I dropped everything and rushed to make it.  Think again.  Actually, I sat on it for another two or three months before deciding to try it out today.  Because I'm just awesome like that.


I won't go into great detail about this because apparently everybody but me was on the "these are the most amazing cookies of all time" bandwagon well before me.  Needless to say, these cookies are pretty darn amazing, they're easy to make, and they're even easier to sit down and eat.  No real tricks to this, other than to make sure the butter is room temperature, not cold or melted.  Also, trust the timing on these...  The recipe says 8 minutes, but on my first batch, I was expecting something more browned so I left them in for 12 minutes.  They were good, but crunchy, and they never got browned like I thought they would.  The next batch I left in for exactly 8 minutes, and even though every fiber of my body screamed that they were underdone...  Actually, they were perfect.

And, I'm happy to say, this recipe allows me to use one of my few baking "tricks."  When it comes to rolling and then flattening these cookies, it's hard to get that perfect "smush," where the cookie's thickness is even, it's round, and there are no unsightly fingerprints on the dough (which also show up on the cookie after it's baked).  My solution?  Use the flat bottom of a glass or cup to smush the cookies.  I actually used one of those retro-style Coke fountain glasses from the dollar store.  I got perfectly smushed cookies every time.     

So, here it is, after years of waiting, multiple requests, and countless hours of research thwarted by Disney's reply to an email sent several years ago...  The recipe to the Disneyland Snickerdoodle. 

Now here's hoping all the people that requested this over the years don't stop reading the website because I granted their wish.  Maybe if I drop the bombshell that I have the Minnie's Bakery chocolate chip supreme recipe people will hang out for another couple of years until I decide to try that one out?


~~~~  °o°  ~~~~

Disneyland Snickerdoodles
As is served at Disneyland
 
°o°  2 sticks of butter
°o°  2 cups granulated sugar  
°o°  1/2 teaspoon salt  
°o°  2 eggs  
°o°  1/4 cup milk 
°o°  1 teaspoon vanilla 
°o°  3 1/2 cups flour
°o°  1/2 teaspoon baking soda
°o°  1/2 teaspoon cream of tartar

For topping:
°o°  6 tablespoons granulated sugar 
°o°  1 tablespoon cinnamon
Preheat oven to 375 degrees.

Cream together using a blender butter and sugar until light and fluffy.  Add eggs, one at a time, milk, and vanilla.  Mix very well so that all ingredients are incorporated and there is no standing liquid in the bowl.  

Combine flour, baking soda, cream of tartar, salt, and sift.  Add, about one cup at a time, to the wet ingredients, mixing well after each addition and scraping sides as needed.

Combine topping ingredients on a separate, small plate.

Roll dough into 1-inch balls and then roll into the sugar and cinnamon mixture so all sides are covered with the sugar mixture.  Place on a greased baking sheet (or a sheet lined with parchment paper) and flatten into disks.  Sprinkle additional topping on the cookies.

Bake in preheated 375 degree oven for 8 minutes, or until cooked through.   


~~~~  °o°  ~~~~

If there was ever a recipe that I was surprised turned out well, it'd be this one.  I've made pancakes and I've made puff pancakes, so I knew kind of what to expect...  But the ingredients on this one looked so different than puffed pancake recipes I've known, I was convinced that this would turn out a big, apple-flavored, flour brick.  Lots of flour, no baking soda or powder...  There was no way this was turning out right.

I have to say, I'm amazed...  Not only did this come out darn near perfect, I can't imagine this could have come out tasting any better.  It was so delicious and soul-warming, I wish I'd made more.  A hit with all the kids, even the ones who hate eating cooked apples, I'm adding this to my regular "breakfast for dinner" recipe rotation.

This recipe is another recipe with a history, which I love.  Versions of this pancake have been featured everywhere from Biergarten's buffet as a dessert in the 80's and 90's, to the Carnation Cafe in Disneyland, as a breakfast treat at The Crystal Palace's massive buffet, even topped with ice cream at Liberty Tree Tavern.  While it's not found anywhere in Disney World as of right now, it does still occasionally appear in the oddest of places.

There is no special trick to this recipe, beyond just having faith that it'll work out beautifully.  A combination of eggy-fried dough and apple pie that's not too sweet, it's definitely worth the experimentation.  Just watch the baking times...  It's hard to nail down the exact time that this will be done as a lot of it depends on the size of the eggs used.  While 20-30 minutes seems like a fair estimate, this could be done in as little as 15 or as much as 35 or 40.  Key thing is, when it's done, you'll know it.  It'll be golden brown, puffed, and smell like an apple pie.


~~~~  °o°  ~~~~

Puffed Apple Pancake
As was served at Carnation Cafe, Disneyland, The Crystal Palace, Magic Kingdom, and Biergarten, Germany Pavilion, EPCOT 

For Apples:
°o°  1 tablespoon butter
°o°  1 cup chopped or sliced, peeled apples
°o°  1 tablespoon lemon juice
°o°  1 tablespoon brown sugar 
°o°  3 tablespoons granulated sugar
°o°  1 tablespoon cinnamon
°o°  1/8 teaspoon nutmeg
 
For Pancake:
°o°  3 tablespoons butter 
°o°  3 eggs
°o°  2/3 cup milk
°o°  1/4 cup flour
°o°  1/2 teaspoon vanilla extract
°o°  1 cup chopped or sliced, peeled apples, cooked
°o°  3 tablespoons brown sugar
°o°  1 tablespoon cinnamon


Preheat oven to 400 degrees.  Melt butter in a pie pan or cast iron skillet in the warming oven, being sure it does not burn.

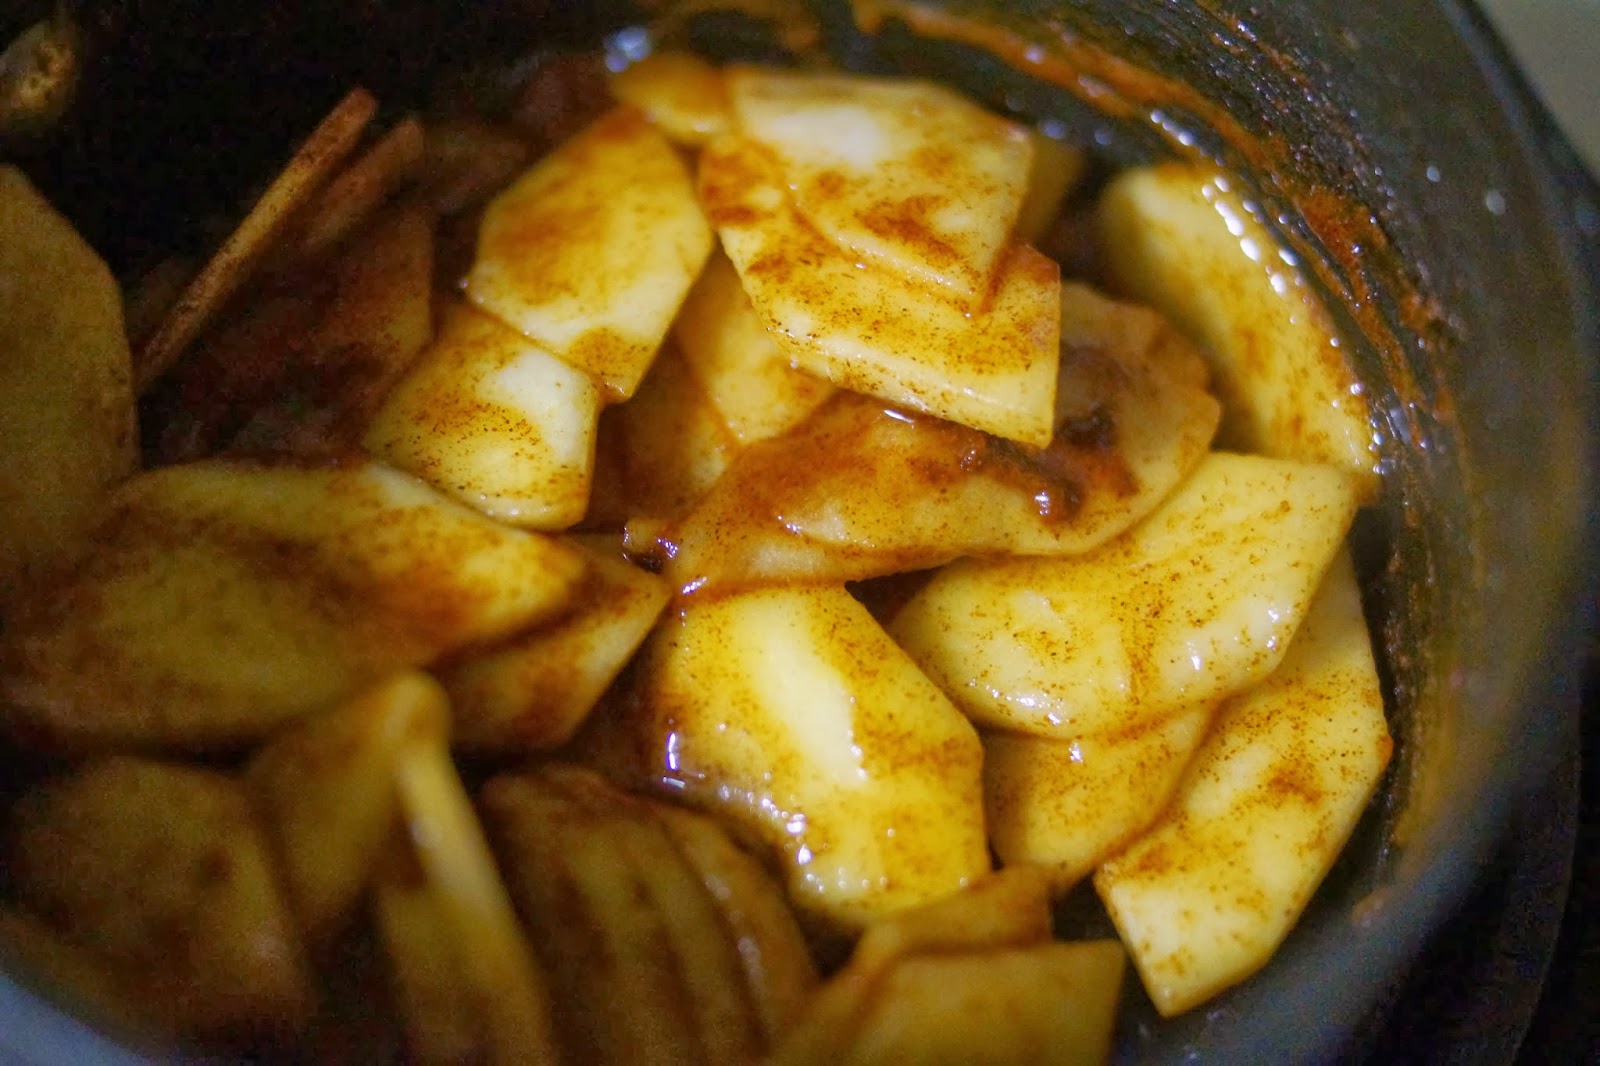
Prepare apples first by melting butter in 10-inch pan over medium heat.  Add apples tossed in the brown sugar, granulated sugar, cinnamon, and nutmeg.  Cook until tender, about 4 minutes.  Remove from heat and pour into a bowl to cool.  Set aside.

In a large bowl, whisk eggs and milk, then sift in flour, whisking until very well combined.  Add vanilla extract.

In a small bowl, combine brown sugar, cinnamon.  Set aside.

Pour mixture into pie pan or cast iron skillet with melted butter.  Top with apples. 
Remove the pie pan from the oven and pour in mixture. Top evenly with the apples, trying to keep them towards the middle of the pan.  Evenly sprinkle the brown sugar and cinnamon mix over the pancake.


Return pan to the warmed oven and cook 20-30 minutes, or until puffed and golden brown.  Serve immediately by slicing as you would a pie, topping with maple syrup or vanilla ice cream. 

~~~~  °o°  ~~~~