Showing posts with label Appetizers. Show all posts

It's no secret...  San Angel Inn is my favorite place to eat on property.  The ambiance, the atmosphere, and the food are among the best in Epcot and Walt Disney World.  Plus, with a slow-moving, relaxing ride that never has any line about 30 feet away?  Perfect.  There really is nothing better in this whole world than filling up at San Angel then rolling over to the "Gran Fiesta Tour" to take it easy.

San Angel Inn has gone through a lot of changes over the years, including an extensive menu overhaul in the mid-to-late 2000's.  While most of the signature dishes made the cut into the new menu (Pollo A Las Rajas and Sopa Azteca), there were a few that were retired or made seasonally available to help bring the restaurant to a more fine dining experience.  One of these dishes was the queso fundido.

The collective mourning that San Angel Inn fans went into at the loss of this popular dish was undeniable.  Pop through forums and blogs at the time it was announced it was retired and it's not hard to find people begging for how to make this hearty guilty pleasure.

I'm happy to say that the folks at San Angel Inn have always been happy to oblige on any recipe when they could, so despite retiring the dish at San Angel Inn, they were happy to share how to make the dip at home.

And I wonder if the demand for this dish and the response of people when they saw it was no longer on the menu played a role in queso fundido finding a new home in the neighboring restaurant, La Hacienda de San Angel?  I will say, of all the establishments I've gotten and reproduced recipes for, the folks at San Angel Inn are in a league of their own when it comes to listening to their customers.  I wouldn't be at all surprised if they brought back this popular dish to their sister restaurant to appease the queso fundido addicts of the world (like myself).

When people read this recipe, they'll be over-the-moon at how ridiculously simple this is to make an appetizer this delicious.  For those who're making it in the style of San Angel Inn, all you need is two ingredients: cheese and chorizo sausage.  For those who're making the updated sister version as featured at La Hacienda de San Angel, you need to add a third ingredient...  A dash of poblano pepper.  Really, it couldn't be easier.  Cook, broil and serve with your favorite chips or flour tortillas.  Keep in mind, this isn't a dip where you stick your chip in and scoop out the cheese.  Think of this as a warm spread, not a traditional dip.  You'll need a spoon to scoop it out and spread it on your delivery food of choice.

Now, I think it goes without saying that an appetizer that's made up of cheese and sausage is not a low calorie, low fat, diet friendly food.  And I can't stress enough, if you don't really blot the fat out of the chorizo, you'll end up with a lot of fat rising to the top during the broiling process.  Really drain the sausage, then blot it with paper towels.  Blot it, blot it, and blot it again.  Then blot it again once more, for good measure.  If you broil it and there is still a lot of visible fat, just let it cool slightly and blot it gently with a paper towel.

I'm still dreaming about how delicious this dish is...  And I just made it about 12 hours ago.  I am in love with everything about this dish and it makes me so homesick for a riverside table in the shadow of a pyramid.  Sigh...  San Angel...    


~~~~  °o°  ~~~~
Queso Fundido
As was served at San Angel Inn, Mexico Pavilion Epcot with adaptations for as it is served at La Hacienda de San Angel, Mexico Pavilion, Epcot
 
°o°  1/2 pound Muenster cheese, grated  
°o°  1/4 pound chorizo sausage, in links with casing or ground  
°o°  poblano peppers (optional)  
Roughly cut chorizo in large chunks (if in a link sausage remove casing).  Add to a warm saute pan and cook over medium, medium high heat until browned.  Stir constantly and, as the sausage cooks, break it up further with a spatula or spoon.  When sufficiently cooked, drain on paper towels.  Turn and blot sausage repeatedly, absorbing as much fat as possible.

Preheat broiler.

Spray an oven and broiler proof shallow, small dish very, very lightly with non-stick spray.  Layer half of the grated cheese at the bottom of dish.  Layer chorizo sausage over the cheese, then top with remaining cheese.  Broil until cheese melts and begins to brown, or 5-12 minutes.  When done, cool slightly and serve (blot surface fat if needed).

Serve immediately with chips or warmed flour tortillas.


~~~~  °o°  ~~~~

I've never tried anything from Victoria and Albert's and boy, this recipe has me thinking I should save my pennies and give Walt Disney World's ultimate luxury dining experience a try.

Victoria and Albert's is located at Disney's Grand Floridian Resort and is one of the most acclaimed restaurants not only in Walt Disney World, but central Florida.  It has the highest luxury fine dining reviews on TripAdvisor and Yelp, and it's one of only three restaurants in all of Florida to have AAA's 5-Diamond Award.  During your two hour experience, you have not just one, but two servers who work with each person individually to craft your own personal menu that's laid out over six courses.  That is, unless you sit at the Chef's Table...  Then you get your own Executive Chef who comes out and consults on your 11 course meal over three or four hours.  No big deal, right?

This is one of the highest levels of fine dining out there.  Men wear dinner jackets, women wear dresses or pantsuits...  They also (somewhat controversially) have a policy to not seat children under the age of 10 due to the size of the dining room and acoustics which command a quieter dining party.  I can't think of any restaurant at Disney that has table side sommilers to help you find individual wine pairings per course.  Very fancy pants, for sure.

Since dining here is slightly out of my price range, I was really excited to try a recipe from here.  Not only did I want to get a taste of what the high rollers get to experience, I wanted the chance to practice some different techniques and just see if I was up to the challenge of making something that's fine dining-style, as opposed to homestyle.

I was really fascinated by this recipe because it wasn't what I expected, in the absolute best of ways.  It ended up being a spectacular reminder that a few well-chosen, high quality ingredients prepared correctly can really knock your socks off.

As this is a cheese soup, my mind went immediately to perhaps the most famous cheese soup on property, and I expected this to be really similar.  However, it could not be more different.  Where the Cheddar Cheese Soup at Le Cellier is thick, creamy, and hearty, this soup is light, clean, and very thin.  The texture is more like your traditional broth soup and not a thick cream.  Designed to be a light soup course meal, this is a great alternative to people who love the flavor of that other cheddar soup, but not the heaviness.  Honestly, and I was told it was sacrilegious to say this, I feel like this soup is actually better than Le Cellier's soup.  While you could bulk it up with bacon for a taste that's both light and elevated, but slightly more hearty, I really think this soup is best appreciated as-is.

I think this recipe is a new favorite of mine and I wish I could do justice to describing the flavor.  The sharpness from the beer is obvious, but it's tamed by the snap of the cheese and the creaminess of the cream, making it a really bold and not overwhelming flavor.  While I can only have a bowl of the Le Cellier soup before feeling full, I ate a whole bowl of this and felt warmed, satisfied, but not heavy.  It's so amazingly delicious and perfect as both a cold weather comfort, or a light introduction to a gorgeous, luxurious dinner.         


~~~~  °o°  ~~~~

Roast Garlic and Gruyere Cream Soup
As is served at Victoria and Albert's, Disney's Grand Floridian Resort
 
°o°  4 tablespoons olive oil
°o°  10 cloves of garlic, crushed and roughly chopped  
°o°  1 small onion, chopped  
°o°  3 stalks of celery, diced 
°o°  1 leek, white part only, diced  
°o°  4 cups chicken broth, not unsalted  
°o°  6 ounces dark beer  
°o°  1 cup heavy cream  
°o°  1 cup Gruyere cheese, shredded  
 
In a large pot, warm olive oil.  Add garlic and cook, stirring constantly, until lightly browned.  Quickly add onion, celery, and leek and cook until tender and onion translucent.  Stir constantly.  Slowly add broth and bring to a rolling boil.  Lower heat, add beer and heavy cream.  Bring back to a low boil.  Using an immersion blender, blend soup until thinned.  Add cheese and stir until melted.  Strain the soup, then return to the stove and warm gently, discarding strained and cooked vegetables.  

Adjust seasoning with salt and pepper and serve.


~~~~  °o°  ~~~~

I think anyone who's spent any time on this site can probably guess I'm a little obsessed with Disney's Polynesian Village Resort. Honestly my love affair with the Polynesian started before I can even remember.  I know we used to zip by on the monorail and I'd kind of peer into the property and I just kind of fell in love with the look, the layout, and the theme.  When I ate at 'Ohana the first time it was pretty much a done deal...  I loved the place.  Now I've been lucky enough to stay there twice and I'm a huge fan of the resort, the dining options, really everything about the Polynesian.  While I have to say Disney's Pop Century is my home, on splurge trips or trips where I want luxury, I'm team Polynesian Village Resort all the way.  The big dream is to get one of the Villas they're opening there in the Disney Vacation Club...

While I've eaten at 'Ohana numerous times, I've actually never been there for dinner.  I know it's the place to eat and it's hard to get reservations there, but I'd love to one day time it so that I'm there for dinner, sitting by the window, and enjoying food while watching Wishes fireworks show in the distance.  For Disney foodies (which I like to consider myself), 'Ohana is one of the tried-and-true places for some of the best dining in Walt Disney World.  Really, it has an impeccable reputation for great ambiance, fantastic service, and most importantly, ridiculously good food.  When you ask people about dinner here, people will inevitably tell you about the two most popular foods there: the welcome bread and the honey coriander chicken wings.

Now, I'm not usually a fan of chicken wings.  They're just not my favorite.  Pretty much the only
wings I eat are at Buffalo Wild Wings.  Anywhere else I skip them.  And that was kind of my feeling about these wings.  I understood everybody thought they were amazing, but as a person who wasn't feeling chicken wings in general, I wasn't convinced the magic of the 'Ohana wings would capture me.  I'll be honest, I sat on this recipe for almost 10 years before getting around to trying it for this site, and I think the only reason I tried it is because my husband loves chicken wings probably enough for the both of us.  While I'm not a fan, he's probably one of the biggest wings lovers I've ever met.  I figured at the very least he'd enjoy them.  And I'll admit, not being a fan of chicken wings, I guess I was always under the impression that making them was a long and complicated process.

First off, making these couldn't be easier.  Make the dry mix, toss the wings, bake, toss them in the wet sauce, serve.  No frying needed.  I'm a big fan of that, both because I'm trying to be healthy while training for the Wine and Dine Half Marathon, but also because frying things is so darn messy.  I'll admit, I taste tested the rub and the wet mix along the way and I thought that this had real possibilities.

Secondly...  These wings may change my mind about chicken wings.  Holy cow, they were spectacular!  Yes, they were messy, but they were this fantastic combination of sweet and spicy without being too spicy or too sweet.  I couldn't believe how moist and juicy these wings were despite what I thought was a really long (longer than it should have been anyway) cooking time.  I can see why these are so popular at 'Ohana.  They're incredible!  My mouth is watering just thinking about them...  Plus, the color on them is gorgeous.  They're a rich, vibrant red color and it's quite dramatic on the plate.

I made these exactly as described below, but I don't think I reduced the sauce enough.  No big deal, it just meant I had enough sauce for eight pounds of chicken wings as opposed to the four pounds I made.

This is for sure a "go out and get all the ingredients and make it tonight" recipe. Even people who're not confident making meats will find that this is pretty easy to get perfect, and it's a surefire family hit.


~~~~  °o°  ~~~~
Honey Coriander Chicken Wings
As is served at 'Ohana, Disney's Polynesian Village Resort
 
Liquid Spice Rub
°o°  1 tablespoon salt  
°o°  2 tablespoons paprika
°o°  2 tablespoons sugar  
°o°  1/2 teaspoon black pepper 
°o°  1/2 teaspoon turmeric  
°o°  1/2 teaspoon ground cinnamon    
°o°  1/4 teaspoon cayenne pepper  
°o°  4 tablespoons canola oil  
°o°  4 pounds chicken wings/drummettes

Wing Sauce  
°o°  1 tablespoon chili powder  
°o°  1/2 teaspoon ground ginger  
°o°  1 tablespoon ground coriander 
°o°  2 tablespoons lime juice  
°o°  1/2 cup soy sauce  
°o°  1 cup honey  
°o°  3/4 cup water
°o°  2 tablespoons cornstarch  
Preheat oven to 500.  

In a very large bowl, combine all ingredients but the chicken for the spice mix and toss until well mixed.  Add chicken to the spice mix and using your hands, toss wings so that they're well covered with spice rub.  Lay chicken pieces on cookie sheets lined with foil so that they're well spaced and not overlapping.  Bake until cooked through and browned, about 20-35 minutes depending on size of wings and drums.  Juices will run clear when they have cooked through.

While the wings are baking, combine all ingredients for the wing sauce in a saucepan and heat to boiling.  Once boiling, reduce heat to a steady simmer and stir occasionally until the sauce has reduced to a syrup and is thickened.  Remove from heat.

When chicken wings have cooked through, toss with the wing sauce in a large glass bowl and serve immediately.


~~~~  °o°  ~~~~


I shared this recipe during my first video last week and I know I'm a bit late with the written followup, but hey, better late than never, right?

I'm sure most people who're on Pinterest have seen this recipe...  It one of the most pinned recipes of 2012 and 2014 and it claims to be the recipe for the best cornbread out there.  And what makes this recipe ridiculously unique is that it involves the use of golden butter yellow cake mix.  Now, I'm not sure if this recipe is truly a genuine Disneyland recipe (I can't find information online confirming it is or isn't used at Disneyland, I've got several recipes from Disneyland that don't use cake mix), because it's so popular, so widely shared, and because I had all the ingredients in my pantry, I figured "why not?"

This recipe couldn't be any easier.  Basically, you make the cornbread and the cake mix in separate bowls according to the package directions, combine the batters, then bake.  Seriously, that's it.  How easy is that?

"Authentic" Disney recipe or not, this cornbread is phenomenal.  Mixing it all together made my kitchen smell like a birthday party...  So delicious.  Then baking it?  Yankee Candle needs to come to my house, smell how amazing it smells, then make a candle.  This amazing combination of butter and warm cornbread.  The cornbread itself...  Oh...  My...  Goodness.  Incredible.  Absolutely spectacular.  For sure my go-to cornbread recipe from now on.  It's moist, soft, flavorful, and it melts in the mouth like butter.  It doesn't crumble and, unlike a lot of cornbread recipes I've used, it doesn't crumble to bits when you cut it.  Thank goodness this recipe makes a ton of cornbread because less than 10 minutes after pulling it out of the oven more than half of the first loaf I made was gone.

While researching this recipe, I found a lot of suggestions saying that when picking the cake mix that the mix without pudding in the mix works the best.  I ended up getting a mix with the pudding in it because I couldn't find anything else.  Apparently it makes the cornbread too sweet, too cake-like with its flavors.  Personally, I didn't find it to have the taste or texture of cake and I didn't think it was too sweet at all.  That said, for those who may want a more savory version, see if you can find the Jiffy Yellow Cake Mix and use that instead (if using the Jiffy Yellow Cake Mix, use one box of cornbread mix to one box of the yellow cake mix as opposed to two boxes as directed below).

This cornbread is incredible.  I consider myself a cornbread connoisseur (it's one of my favorite carbs)...  If I see it in a menu, I order it.  I make it all the time.  And this version of cornbread is hands-down my favorite.  I'm already thinking about when I can make it again.

For those interested in watching how I make this recipe I did make a video, the first of what I hope are many upcoming webisodes for the website!


~~~~  °o°  ~~~~

Disneyland's Famous Cornbread
As is supposedly served in Disneyland
 
°o°  2 boxes of Jiffy Cornbread Mix
°o°  Ingredients listed on the back of the boxes to prepare EACH BOX of cornbread as directed 
°o°  1 box of Yellow Butter Cake Mix  
°o°  Ingredients listed on the back of the box to prepare cake as directed  
Preheat oven to 350 degrees.

Prepare the Jiffy Cornbread Mix as directed (since two boxes are being used, prepare each as
directed, essentially doubling the recipe).  Combine ingredients but under mix the batter slightly.  Set aside.

In a separate bowl, prepare the Yellow Butter Cake Mix as directed, undermixing the batter slightly.  Combine the prepared cornbread batter with the prepared cake batter and mix thoroughly while being careful to not overmix.  Pour into greased 9x13 pan (or loaf pans, but fill only slightly over halfway...  This rises considerably!) and bake for 30-35 minutes or until bread is golden, springs slightly to the touch, and a wooden stake inserted in the center comes out clean.

Cool slightly before removing from the pan and cutting.


~~~~  °o°  ~~~~


One of the things about this blog is that it gives me the chance to not only explore Disney foods I've never gotten the chance to try in the parks, but that it gives me the chance to make something that I tried while on a vacation and loved.  Like Remy describes (yes, I'm talking about the fictional rat from "Ratatouille"), good food comes together, like a symphony, and takes you on a journey, sometimes to an entirely different time and place.

That is what this dish did for me.  One bite and I was back in EPCOT, walking the World Showcase on a beautiful, sunny day, probably on my way to Soarin or the Japan Pavilion.

This meal has quite the background.  It was one of the most popular dishes on Le Cellier's appetizer menu.  Served in a cast iron skillet, designed for family-style sharing, it was a great, fun, and unique appetizer option.  When the restaurant changed their menu to reflect their new status as a signature dining option, despite its popularity, the dish was retired.  Believe it or not, threads started popping up on various forums of people trying to figure out where it went, where else they can go in Disney to find it, even how to make it.  When people talked about the reasons it was such a tragedy Le Cellier went to an all-day signature dining experience, the retiring of this dish was a complaint that came up frequently.

Perhaps due to that popular demand, the following year at the EPCOT's Food and Wine Festival a version of the dish appeared again at Canada's kiosk, which is also where I had it for the first time.  I mean seriously, who could pass up a booth that had both sausage and
the famous Canadian Cheddar Cheese Soup?  I vividly remember waiting in a long line, juggling multiple plates (two of each the soup and the sausage) while scrambling to find a spot to eat because every chair, bench, and table was full.  Ben and I ended up finding a spot on the top of a covered trash can in a little area right next to the World Showcase Lagoon.  We stood and ate, hunkered over this stupid garbage can, just relishing every single bite while enjoying a postcard perfect day at EPCOT.  I still remember how the sky was so blue, it almost hurt to look at it, and all the trees and plants around the lake were a vivid, emerald green.  It was warm, with a beautiful breeze that was strong enough that there were little waves rolling across the lagoon.  Stunning.  Peaceful.  For sure a happy Disney moment.

I can't say how happy I am to have this recipe.  This is really just a memory on a plate.  Even with the slight changes I made (more on that in a minute), every moment of this recipe was an exciting Disney memory, a fantastic Disney smell...  Not even joking when I say while I was making the polenta, I yelled out "This smells like Disney!" and all five people in the house huddled over the pot taking big, deep breaths.  We all agreed, by the way, it does smell like Disney...  It smells exactly like the buffet area of Tusker House.  Just saying.

Anyway, I did make some tweaks to the recipe.  First off, I used frozen corn instead of cutting fresh corn off the cob and roasting it.  We live in New Hampshire and it's March...  Fresh corn on the cob?  Not happening.  While I'm sure it would have been a deeper flavor if I'd used that roasted corn, the frozen corn was certainly a completely delicious, functional substitute.  The other somewhat major change I made was I used spicy pork sausage.  The recipe as written calls for chicken sausage, and while the version at Le Cellier did alternate between spicy pork and spicy chicken sausage, the Food and Wine version does use exclusively chicken sausage.  My switch was purely personal preference and economics...  I'm not a huge fan of the chicken sausage available at our grocery store, and regular sausage was on sale.  The only other special notes I have about this recipe is that this recipe is the base to both the old Le Cellier appetizer, but also the Food and Wine Festival's Canada offering.  That said, both dishes are dressed slightly differently...  One with a lot of greens, a little cheese, and the other with a sauteed pepper onion mixture.  When I served this, I went just with the base recipe, the polenta and the sausage.      

Of all the dishes I've made in recent memory, this was one of my absolute favorite meals.  Everybody loved it and we had absolutely no leftovers.  I did stick with the creamy polenta as opposed to letting it cook up so that it was more firm (which is what they do at Disney too), and I think it was the absolute perfect compliment to that spicy sausage.  I couldn't get enough of this meal.  I'm already dreaming about when I can make it again...  Only one bite and I was back next to the World Showcase Lagoon enjoying an amazing meal on the top of a covered trash can, thinking about Soarin Fastpasses, sake tasting in Japan, and enjoying a perfect fall day at EPCOT. 

~~~~  °o°  ~~~~

Spicy Sausage with Cream Sweet Corn Polenta
As was served at Le Cellier, Canada Pavilion, EPCOT and Food and Wine Festival, Canada Kiosk
 
°o°  1 1/2 teaspoons olive oil 
°o°  1 medium Spanish onion, small dice 
°o°  2 tablespoons diced garlic 
°o°  2/3 cup fresh corn, about one cob, removed from cob  
°o°  1/2 ounce basil, fresh chopped (or 1 tablespoon basil)  
°o°  1 cup water  
°o°  1 cup heavy cream  
°o°  1/2 cup maple syrup 
°o°  1/3 cup ground yellow or white cornmeal 
°o°  1/3 cup grated Parmesan cheese 
°o°  1 1/2 teaspoon chopped chives 
°o°  Salt and pepper, to taste 
°o°  1 pound spicy sausage links, chicken or pork, casings removed (if slicing in half for serving)

Preheat oven to 350 degrees.  Heat olive oil in oven-safe skillet over medium heat.  Add onions, garlic, corn, and cook about 5 minutes or until onions are translucent and garlic is fragrant.  Add in basil and stir about 10 seconds.  Add water, cream, maple syrup, bring mixture to a light boil.  Reduce heat to low and while whisking briskly, add in cornmeal.  Cook on low heat for 5 minutes while continually whisking mixture.  Cover the pan with foil and bake 45 minutes or until polenta is creamy and absorbed most of the liquid, similar to the consistency of oatmeal.  Remove pan from oven and stir in the chives, Parmesan cheese.  Season to taste.  Keep warm but set aside.
 

Grill sausages until done and juices are clear.  

Spoon polenta onto warmed plates or serve in skillet.  Slice sausages in half lengthwise and serve over the warmed polenta.  Top with grilled vegetables, greens, or cheese, or serve as is.
~~~~  °o°  ~~~~
Warning: this post contains a tangent which I promise will all tie together in a way that makes sense.

This weekend is the Walt Disney World Marathon Weekend.  The last RunDisney race before the Princess Half Marathon and the Glass Slipper Challenge, an event that I'm running in (and woefully under-trained for).  Right now, my mind is buzzing with pre-race details and plans for our racecation and today was one of the last checkpoints before arrival day...  Early check-in!

For the Princess Half, we'll be staying at Disney's Polynesian Resort, which is an absolutely stunning hotel.  I was lucky enough to stay there in January of 2013 and I loved nearly every minute of it.  It's peaceful, it has a fun theme, it's on the monorail, it has a view of Cinderella's Castle, it's on a lake...  What's not to love about this hotel?  Seriously, any place that trusts me to use a self-serve Dole Whip machine that's within walking distance to my room is a great place.

The funny thing is, other than the required breakfast at Ohana and the rampant abusing of the bottomless refills of our resort mugs (pomegranate lemonade!), we didn't eat there at all.  No Tonga Toast, no pineapple pancakes, not even a Mickey waffle.  We always opted to eat somewhere else.  It wasn't until May of 2013 when a very last-minute trip meant that I was at the mercy of whatever was available and I decided to give Kona a try...  And I figured out why the lobby of The Polynesian always smells so good.  It's the delicious intermingling of the smells of Tonga Toast, pancakes, and sweet bread.  After a completely amazing dinner with wildly unique and delicious food, Kona went straight to the top of my "hidden Disney gem" list and I immediately regretted not eating there every single day of my January trip.

A mistake that will not be made again.

To bridge the gap between now and then, I've started to get all Poly-crazy.  We've watched "Lilo and Stitch" at least 3 times, I've made most of my social media skins something related to the Poly, I even researched the music they play in the gift shop so that I could build a playlist for the gym.  Then suddenly I remembered...  Hey, I have the recipe for Kona's famous sweet bread...  And I even tried to make it for the blog with less-than-spectacular results.  So off to the kitchen I went, with two goals in mind...  Vindication and the satisfying of a craving.

For those who've read my blog for awhile, it's no great surprise that occasionally yeast bread presents some challenges for me...  But I've fine-tuned my yeast bread magic since
then.  Trick number one? I turn my oven on to the very lowest setting it has while I'm making the dough, then when it's time to let it rest and rise, I turn the oven off, cover the bowl, and put it in the warm oven with the oven door open slightly for the first 10-15 minutes or so.

Brilliant, right?  Seriously, I think since I picked up that little trick, I haven't had bread go flat on me.  Then, if I have a second rise, I actually put the oven on to preheat, cover the dough, and put it on the stove.  That usually works, though I have to be careful that it's not so warm that the bottom of the bread is already starting to brown, meaning I'll have a burned bottom by the time it's done (if you laughed reading that, it's OK, I laughed writing it).

If somebody were to tackle yeast bread for the first time, despite my first failures, I'd say this is a great place to start.  Make sure your pineapple juice is nice and warm, but not too warm, don't over-knead and you're good to go. 

The final product, four amazing mini-loaves of bread, is so close to the real thing that it's hard to not eat it all right out of the oven.  Trust me, I know because I made them 4 hours ago and I'm already down to one loaf...


~~~~  °o°  ~~~~

Kona Cafe Sweet Bread
As is served at Kona Cafe, Disney's Polynesian Resort
 
°o°  1 cup warm pineapple juice
°o°  2 tablespoons active dry yeast
°o°  1/2 cup sugar
°o°  3 eggs, room temperature
°o°  4 tablespoons butter or margarine, softened  
°o°  4 3/4 cups flour
°o°  1 teaspoon salt  

Combine pineapple juice and yeast in the bowl of a stand mixer and allow to sit about 5 minutes, or until foamy.  Add in sugar, eggs, and butter and mix.

In a separate bowl, combine flour and salt.  Add half the flour mixture into the yeast mixture and mix on low speed until fully incorporated, being careful to not over mix.  Turning off mixture, add remaining flour and incorporate using hands.  The dough should pull away from the sides of the bowl, but still be very sticky.

Cover bowl with a slightly dampened dish towel and allow to rise until doubled, about 1 hour.
 

Turn dough onto a floured surface and divide into 4 equal portions.  Form each portion into a ball and smooth the surface (I do this by holding the ball in one hand and gently pulling down on the surface of the ball, pinching the excess to under the dough ball...  There's a good video here) and place on a cookie sheet that will be used for baking.  Cut an "X" on the top of each ball about 1/2 inch deep.

Cover with dish towel and allow to rise in the warmest part of the kitchen for about 45 minutes.  10 minutes before baking, preheat oven to 375.  

After 45 minutes has passed and dough has risen again, remove dish towel and bake for 20-25 minutes or until golden brown.

Serve warm with macadamia honey butter.
~~~~  °o°  ~~~~
Every once in awhile, I get a recipe directly from Disney that I get really pumped to try.  Even though I've been sitting on this recipe for a year, this was one of those recipes I wanted to try so badly.  Not exactly sure why I waited so long...  But whatever.  Later is better then never, right?

Of course, at every available turn, I did my best to try to mess this recipe up as thoroughly as possible.

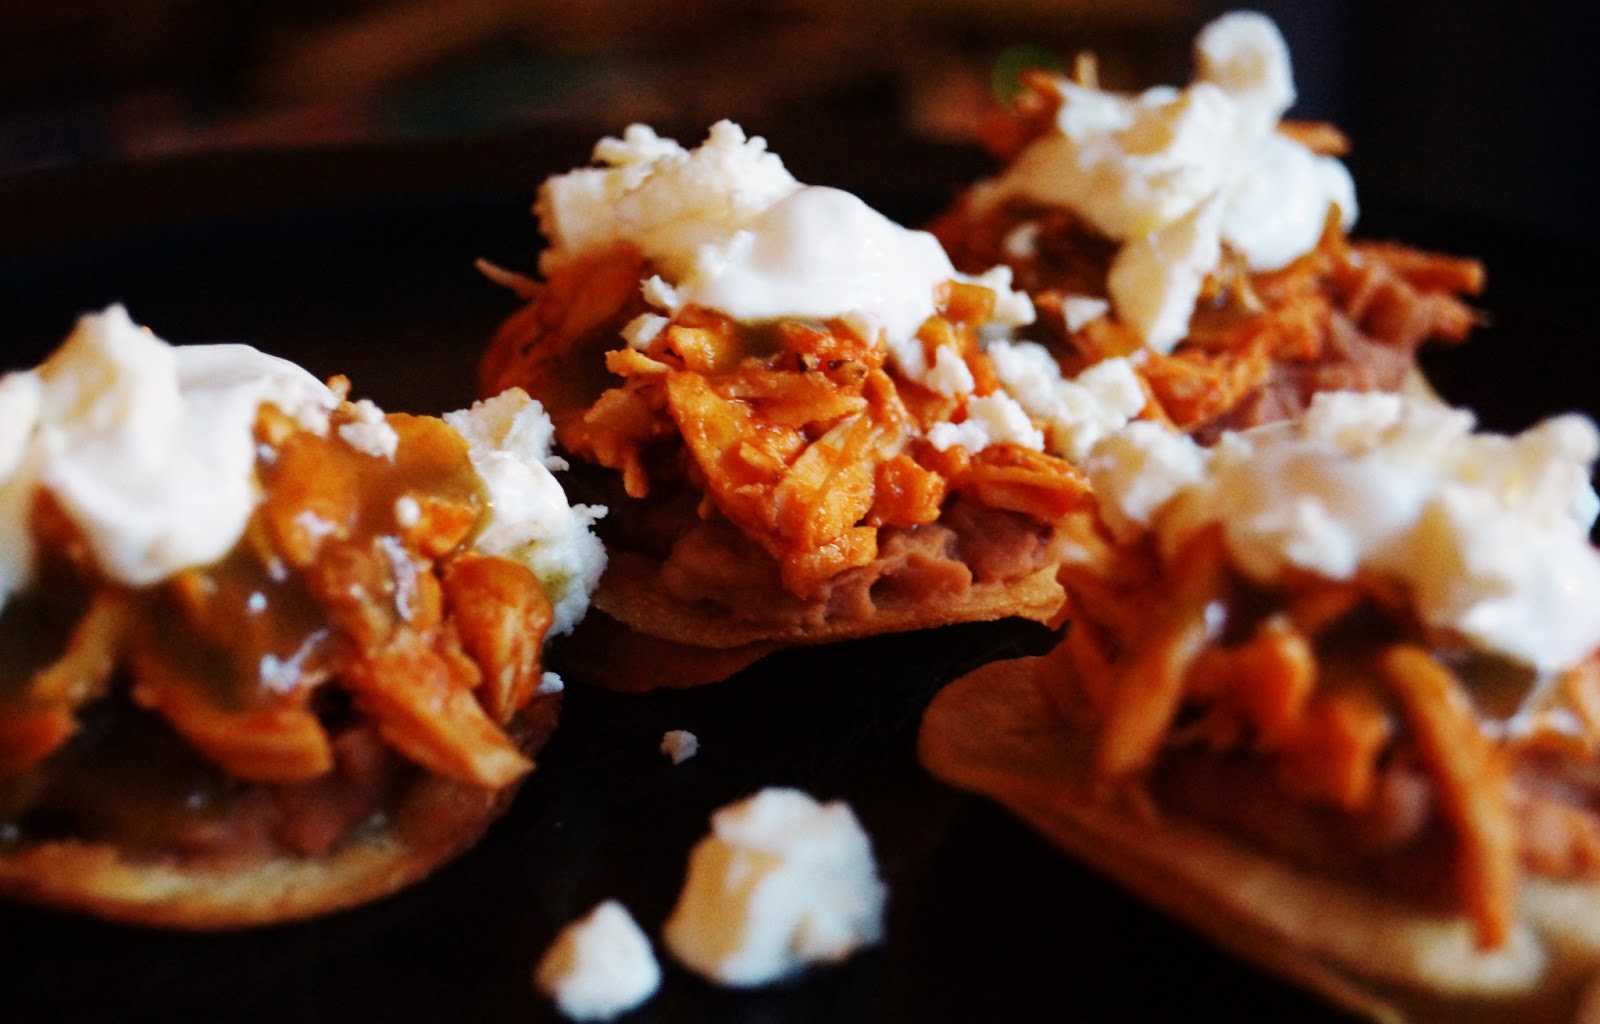
A little about this recipe...  It comes from San Angel Inn, one of my favorite (if not very favorite) restaurants.  Being a fan of almost nothing in this dish (my hatred of refried beans is well documented and I regularly go through "I hate chicken" phases), I tried it under duress, expecting to want to spit it into my napkin.  I was very happy to discovered that I love, love, loved it and regretted that there were only 3 on the dish, and that I had to share.  When I got home from Disney, I searched online and found nothing by way of a recipe, nor was it in any of my books.  So I reached out to my Disney source and, 3 months later, I had the recipe, directly from the chef himself.


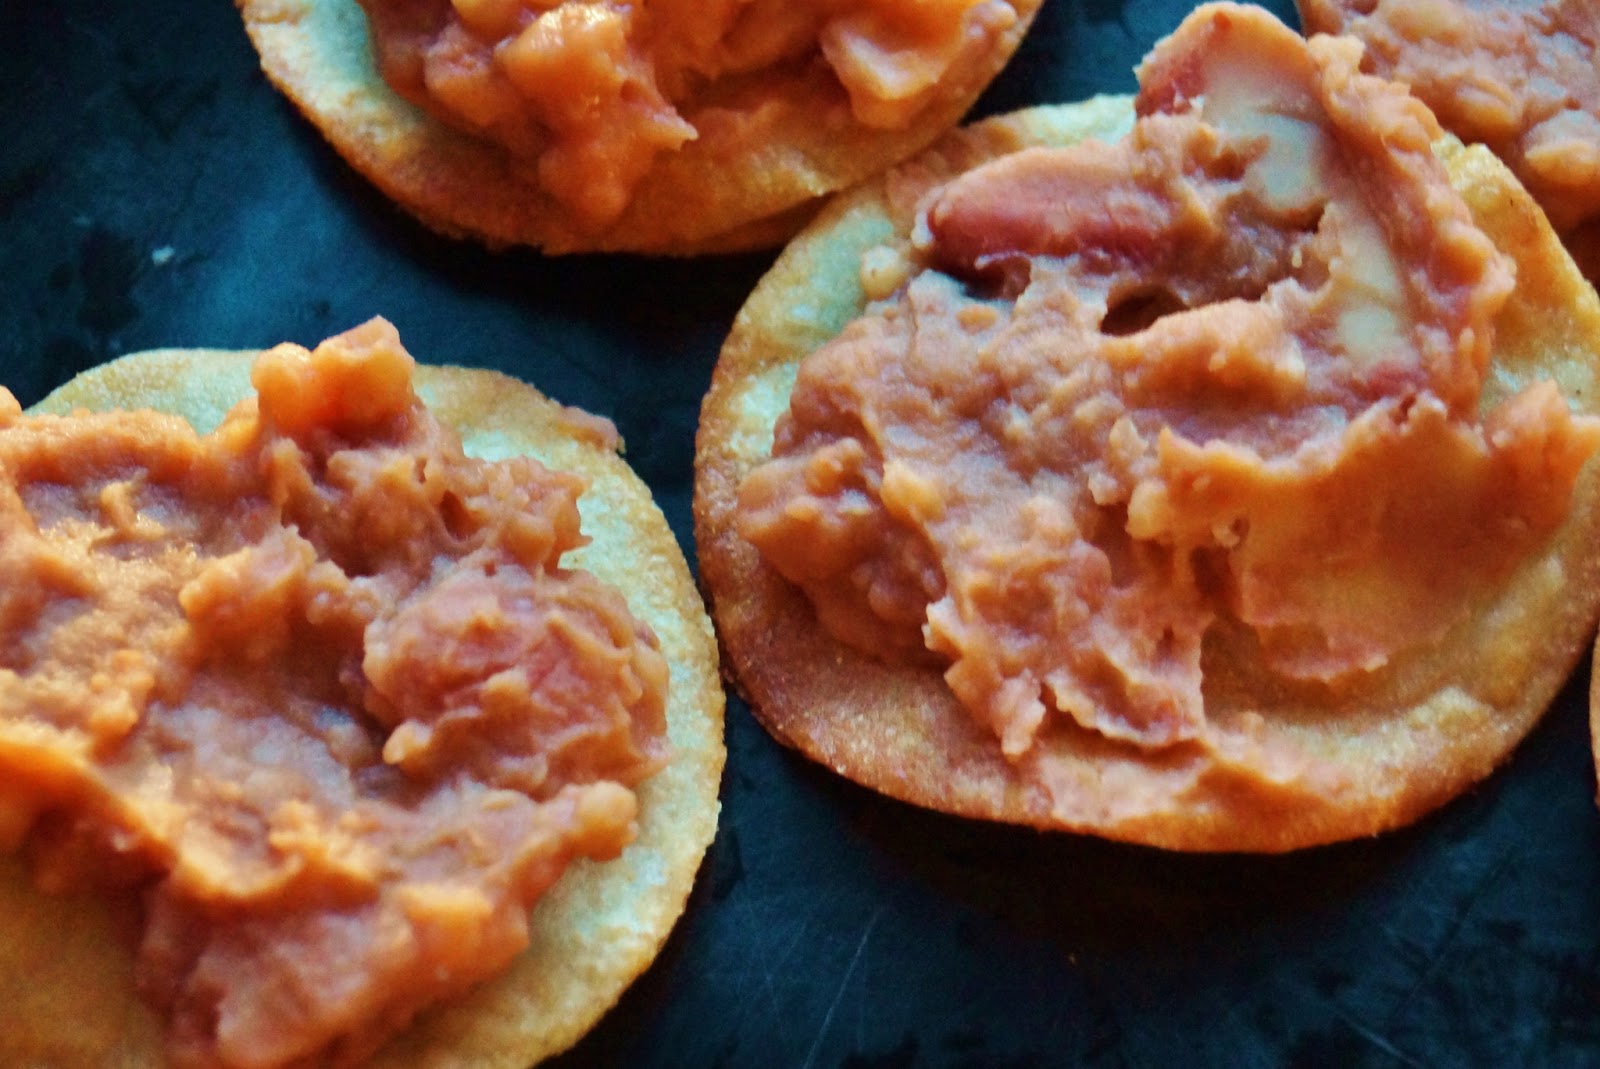
 For reasons I can't quite explain, I've been obsessed with making this recipe recently, and I finally gave it a whirl.  And then I managed to make a ton of stupid little mistakes.  First I bought black beans instead of refried black beans...  They were next to each other on the shelf, I grabbed the wrong one.  Sigh.  Then I had a tough time with the chicken...  I didn't let it cook long enough, so instead of fork-tender, it was kind of rubbery.  Double sigh.  I accidentally added too much water to the sauce and had a bear of a time seasoning the chicken because I didn't let it cook in the marinade long enough.  Then, the biggest error, I bought verde sauce, which was mind-blowingly spicy, instead of using guacamole.  Honestly, I don't know what I was thinking there. 

In the end, despite my numerous mistakes, it actually came out really well and tasted almost the same as what they serve at San Angel.  Even the chicken was good after I let it cook for longer.  Probably won't make the verde sauce mistake again, though.  Yikes.


~~~~  °o°  ~~~~

Tostadas de Tinga
As is served at San Angel Inn, Mexico Pavilion, EPCOT
 
Marinated Chicken
°o°  8 oz chicken breast 
°o°  1/2 oz diced onions
°o°  4 garlic cloves, chopped
°o°  16 oz water
°o°  3 oz chipotle paste
°o°  3 oz tomato puree 
°o°  salt and pepper to taste

Tostadas 
°o°  8 oz cooked chicken (see above)
°o°  4 small corn tostadas (or corn tortillas, cut with a round cutter to slightly larger then chip size)
°o°  4 oz refried black beans, warmed
°o°  2 oz queso fresco or shredded Monterey Jack cheese
°o°  1 oz guacamole
°o°  2 oz sour cream

In a large pot with water, boil chicken.  Once cooked, cool down the chicken and shred.  Set aside.

Saute onions in a saucepan until they are caramelized.  Add garlic.  Add water, chipotle paste, tomato puree, and chicken.  Cook over medium for 30-40 minutes and salt to taste.

In a sautee pan with a thin layer or oil, fry corn tortillas until crunchy (step not needed if using small tostadas...  They should be crunchy already).  Allow to drain on paper towels.

To assemble, spread layer of warmed refried black beans on tostada.  Add shredded, cooked, marinated chicken.  Top with drizzle of guacamole, sour cream, and top with cheese.  Serve immediately. 

 
~~~~  °o°  ~~~~