Showing posts with label Cakes. Show all posts

I know this is almost sacrilegious to say, but I've never had the school bread in Epcot's Norway Pavilion.  I know it's got a loyal, nearly fanatical fan base and I know saying I've never tried it is like saying I've never had the turkey leg or a Dole Whip...  But for some reason, I've never made space in my stomach to give it a shot.

The recipe is all over the place online and I've been saying for months that I'd try it, but like when it's at Epcot, I never got around to adding it to my "bake" list until now.  Doing a yeast bread that involves icing and custard, no matter how delicious it sounded, it seemed like it was a major investment in time...  And it was.  It's not a hard recipe, just one with a lot of
steps that takes longer than your average baked good.

I did follow the recipe exactly, but as anybody who's read this blog knows, making custard seems to never work out for me (as we can see here and here) and I was yet again defeated with this recipe.  While I got so, so, so close, I cooled it off too early, it was ever-so-slightly too runny still so I added whipped topping to thicken it off.  Brilliant solution that tasted fabulous, but I'm sure it made it taste less like it does in the parks.  Next time, I'll get pre-made custard or I'll just make pudding...  Which I mess up only about 50% of the time as opposed to 100% of the time.  Also, I ended up way more flour than the original recipe called for.  I'm not sure if it's because I might have used an extra half a cup of water, or if it just really needed the extra flour...  As written, the dough was so sticky and watery it was completely impossible to
handle.  And this makes a lot of school bread.  I ended up with 14 pastries.

I tasted this as it went along and it was really neat to see how each of the components came together to change it from being a regular yeast bread that was maybe even a little savory, like a dinner roll, but ended up being the right level of sweet and hearty.  I actually thought this would be like a doughnut when I decided to do this recipe.  It's more like Norway's answer to a sweet breads like cinnamon rolls, without the super sweet overload.  I really liked it and will go out of my way to have it next time at Epcot.


~~~~  °o°  ~~~~

School Bread
As is served at Kringla Bakeri Og Kafe, Norway Pavilion, EPCOT
 
Bread
°o°  2 pints water  
°o°  2 1/2 ounces melted butter
°o°  3 ounces instant or dry yeast  
°o°  2 - 2.5 pounds flour (with more available as needed)
°o°  3 1/2 ounces sugar  
°o°  1 teaspoon cardamom  
°o°  1 egg

Sugar Glaze  
°o°  2 cups confectioners' sugar
°o°  1/4 cup milk  
°o°  1 teaspoon vanilla extract  
°o°  12 ounces shredded coconut, shredded and toasted  

Vanilla Custard
°o°  1 2/3 cups milk 
°o°  1/4 cup sugar  
°o°  1/4 teaspoon vanilla extract  
°o°  4 egg yolks  
°o°  1 tablespoon cornstarch dissolved in cool water  

Bread
Add warm water to melted butter (about 90-95 degrees) and add yeast and let stand 2-3 minutes or until mixture starts to froth.  Add flour, sugar, cardamom, and egg.  Mix 5-10 minutes until dough stiffens, adding more flour as needed.  Cover tightly with plastic wrap and allow to rise 1 hour, or until dough doubles in size.

Punch down dough and roll dough into a thick log, handling as little as possible.  Cut dough into 5 ounce portions and roll into a ball. Do not press down!  Place them on a greased baking sheet and allow them to rise another 15-30 minutes, until the dough has risen and puffed, but not spread.

Bake in an oven preheated to 375 for 15 minutes.  Breads are done when they have a slight crust and the bottoms have browned slightly.  Let cool on a wire rack.  When cooled, hollow out an area for the filling in the middle of the bread, making sure to not go all the way through the bread.

Sugar Glaze
Combine all ingredients except the coconut to form a thick glaze.  Working quickly with one bread at a time, dip bread hole-side down in the sugar glaze and coat with toasted coconut.  Return breads to wire rack to dry.

Vanilla Custard
In a saucepan, bring milk to a boil.  Remove from heat and set aside, skimming away the
skin.

In a bowl, beat sugar, extract, and egg yolks until mixture has doubled.  Do not over mix.  Put mixer to low and slowly add several spoonfuls of warm milk to temper the custard mixture.  Then slowly stream milk into mixture and mix until just incorporated.  Transfer to a metal bowl or top portion of a double boiler.  Over a double boiler, slowly add the dissolved cornstarch to the custard mixture and stir gently and constantly until mixture thickens.  Do not allow to boil.  When warmed and thickened, move bowl to an ice bath to cool completely.

Once totally cooled, using a piping bag, pipe custard into pastry and finish with a decorative dollop or swirl.


~~~~  °o°  ~~~~


This post was featured in the Februrary link party "Ride the Rails" featuring topics related to Disney's "Frozen" in the Disney parks, hosted by "The Magical Blogorail."


Chef Ramsay says making chocolate lava cake is one of the hardest baked goods to make.  Cook it too little, it collapses on itself.  Cook it too long, it's basically a brownie that is slightly underdone.

Challenge accepted Chef Ramsay.

I've only actually had a lava cake twice...  The first time I made it myself, not really knowing what I was making.  I remembered it tasted good, but it was before lava cakes were really a thing and everybody I served it to thought I had just an underdone cake.  Dramatic effect was nulled by suspicious questions of "are you sure you cooked it enough?"  The second time I had lava cake was actually at a local Italian restaurant and it was overdone.  I cut into it happily waiting for my rush of "lava" and...  Nothing.  It was like slicing into a cake.  Talk about disappointing!

When I made this and got it right on the first shot, I'm not going to lie, I felt a huge sense of accomplishment.  Watching the chocolate flow out of the cake is just so fun and so cool.  I wish I could describe the taste...  It's really, really chocolatey without being sweet or bitter.  Since I'm a lover of warm desserts, this was the perfect mix of cake and gooey warmth.  It's a chocolate lover's dream!

The cake itself is very easy to make, it's the timing on the baking that's a real trick.  My three tips are make sure that you grease the dickens out of the custard cups for the cake and put a ton of sugar in to coat.  That makes getting it out so much easier, and it increases the chance that your cake won't fall or get nicked when you're taking it out of the custard cups.  Second, watch these in the oven like a hawk.  Your window of opportunity on getting this right is so, so, so short.  This more than any recipe I've done is relying more on judgement as to if it's done and not a flat cooking time.  Third...  When the top starts to crack, the center is firm, but it doesn't spring back when lightly touched, and the edges start to pull away from the cup...  Then it may be done.  Pull it out, run a knife around it, pop it out as gently as possible, and serve it immediately.

I think this is certainly one of the most fun desserts I've served in awhile and it was a huge hit around the house.  I loved how dramatic it was cutting it open and its the perfect non-traditional, almost fancy dessert that really makes an impact.  And it taste like heaven!


~~~~  °o°  ~~~~

Chocolate Lava Cake
As is served at California Grill, Disney's Contemporary Resort
 

°o°  8 ounces semisweet baking chocolate  

°o°  1 cup butter  
°o°  5 egg yolks  
°o°  4 whole eggs
°o°  3/4 cup granulated sugar (and more for dusting pans)  
°o°  1/3 cup all-purpose flour
°o°  powdered sugar, for dusting

Preheat oven to 375 and grease custard cups with butter or non-stick spray.  Coat with granulated sugar and shake out the excess.  Set aside on a baking sheet.

In a double boiler, melt chocolate and butter until completely melted, incorporated, and smooth when mixed.  Remove from heat for about 10 minutes to allow it to cool slightly.

In a separate bowl, combine eggs and beat using an electric mixer.  After eggs are thoroughly beaten and are a lemon color, add sugar.  Beat vigorously for several minutes until incorporated and slightly airy, but still thick (like a custard).  Drizzle in cooled chocolate mixture and fold until blended entirely.  Sift in flour, mix lightly for another minute.

Pour into prepared cups until about 3/4 full.  Bake at 375 for 25-35 minutes depending on your container.  When the top is set, the sides are beginning to pull away from the dish, but the center does not spring back when touched, cakes are done.  Do not overbake.

Run a butter knife around the edge of the cake and dish to loosen, place a plate face down over the dish and flip.  If the cake does not come out, hit it slightly to loosen further.

Serve immediately dusted with powdered sugar and served with ice cream, if desired. 


~~~~  °o°  ~~~~

It's my birthday today!  Happy birthday to me!  This one actually kind of snuck up on me...  I had so much going on for the first half of August, it didn't really dawn on me that my birthday was approaching until last Friday.  However, we're celebrating by going on an adults-only daytime date to the nicest movie theater in the area (which is 2 hours away) to FINALLY go see "Guardians of the Galaxy" and then have lunch at a local Mexican restaurant.  I'm so excited!

I figured that, being my birthday and all, it'd be fun to make up a nice little cake or pie for myself.  No big deal, right?  Well, I stumbled on what I thought was the perfect idea...  Passion fruit cheesecake from 'Ohana.  I like tropical things!  I love cheesecake!  The Polynesian is one of my favorite places to stay!  It was a no-brainer...  What a great birthday treat.

Well, being older apparently doesn't make me wiser.  I didn't realize the recipe I had was horribly incomplete until I actually started making it because I didn't actually read past the ingredients section when I was thinking about doing the recipe.  Whoops.  Maybe I should have done so, especially considering the whole recipe is done by weights, not measuring cups.  Whoops again.

I still made a go at it...  I figured as long as the ingredients and their amounts were right, nothing would stop it from coming together...  Right?  I'm not a crummy cook, surely I can figure this out.  And I think I did.  Kinda.  Yes, it took over 1 hour and 45 minutes to bake.  No, I'm not sure this is what it's supposed to look like, taste like, or be.  Yes, it tastes really good.  No, I'm not going to make it again.  Should my readers...  Jury is out.

The problems of this recipe were numerous.  The bake time I was given was 45 minutes.  It
actually took closer to two hours.  There was no directions on how to specifically make the passion fruit sauce.  That took 45 minutes instead of 15 minutes to bake.  I over-beat the snot out of the custards, both of them, because I didn't know not to.  I didn't know I shouldn't have used fat free cream cheese so it didn't incorporate well.  I bought 2 and a half dozen eggs.  It wasn't enough.  So many lessons learned.

I loved the sweet tartness of the passion fruit sauce and the custardy cheesecake actually worked really well for the overall taste.  It was refreshing and exotic, though not as strongly flavored as I'd have hoped.  It was also very dramatic on the plate which is unique for cheesecakes.  But overall it generally wasn't worth the trouble to make, especially using the actual Disney recipe.  It's time consuming, complicated, hard-to-make, and while it's delicious, it's not delicious enough to justify the time, expense, add numerous eggs.  Maybe the complete recipe is, I don't know.  File this under "like the idea, but not what I thought it would be."

I have included the recipe as I did it below, and yes, all of it is by weight.  This can be converted online for those who wish to try making this recipe.  I can say that for the eggs, I didn't buy yolk-only liquid eggs (do they make such a thing?) but if there was ever a time to do so, it'd be for this recipe.  Maybe I had exceptionally small chickens laying exceptionally tiny yolks, but each yolk I got weighed about half an ounce or less.  So yes, I used 24 eggs to make this.  I'm literally swimming in unused egg whites.  I also think the original recipe implied doing this in individual sized containers, which I didn't understand until too late...  And I would have used my springform, however I just moved and I have not a clue where it is.

Keep in mind that this recipe was horribly incomplete and the recipe below is just what I cobbled together to get the final product above.  It tastes great, but it is complicated and time consuming.  If they still serve this at 'Ohana, and I didn't see that they do, whatever they charge for it isn't enough.  It's really hard to make!


~~~~  °o°  ~~~~
Passion Fruit Cheesecake
As is served at 'Ohana at the Polynesian Village Resort 


Cheesecake Custard  
°o°  2.5 ounces of cream cheese    
°o°  1 1/4 ounces granulated sugar  
°o°  1 1/4 teaspoon whole milk  
°o°  10 ounces butter
°o°  1 3/4 ounces whole eggs
°o°   5 ounces egg yolks
°o°  Premade pie graham cracker crust or a spring-form pan lined on the bottom and slightly up the sides with graham cracker crumbs

Passion Fruit Sauce 
°o°  1 14.5 ounce can of condensed milk  
°o°  7 ounces egg yolks
°o°  2 ounces lemon juice
°o°  8 ounces passion fruit puree 

Preheat oven to 250.

In a saucepan, combine cream cheese, sugar milk, and butter.  Heat until the butter and cream cheese has melted, whisking constantly.  Heat until the liquid is close to boiling; there will be bubbles and a very light foam building around the edge of the liquid on the saucepan.  Remove from heat.

Combine the eggs and the yolks in a large heat tolerant container.  Using about a half of a cup of the heated butter mixture, slowly drizzle the liquid into the eggs while mixing constantly to temper the eggs.  Pour the egg mixture back into the saucepan and over medium-low heat, cook until it's a thick custard consistency and all the cream cheese is re-melted.  Whisk constantly but not vigorously.  Should only take 5 or so minutes.  Pour into pie shell or graham cracker crumb-lined springform pan (if using a springform, graham crackers should line the bottom and only about an inch up the side of the edge of the pan).  Bake at 250 degrees in a water bath for between 45 minutes and one hour, or until the custard is completely set.

While the cheesecake custard is baking, combine all ingredients for the passion fruit sauce.
 After the cheesecake custard has finished baking (45-60 minutes), top with passion fruit sauce and bake an additional 30-45 minutes until the passion fruit sauce is set.  When set, neither the custard or the passion fruit sauce will appear liquidy and will jiggle like gelatin when shaked.

When done, remove from the oven and allow to cool uncovered until room temperature then refrigerate.  Cut and serve when cooled.  


~~~~  °o°  ~~~~

Believe it or not, I'm one of the few people who's never been to the Boardwalk Bakery...  I guess it's because while I like sweets, I'm more of a savory eater, especially when it comes to my snacks.  I'll pretty much always pick a bag of chips over a baked good.

But this recipe?  I've had my eye on it for a long, long time.  While I may be a savory eater, I do love baking, and I love trying out new recipes for baked goods that look deliciously unique.  While brownies and cheesecake aren't unique on their own, combining them to one, scrumptious dessert...  Brilliant.

While time consuming, this is a really great recipe for a first time baker.  Though let me just say, if I had one tip to pass on while making this, it's literally impossible to put too much Pam in the dish used to bake this.  Literally, impossible.  I had been warned to really, really grease the pan, and I went what I thought was overboard, but it ended up still being not enough, especially around the edges.  It made extracting the brownies with the cheesecake on top (without it all falling apart) really, really tricky.  A friend of mine told me the best way to release brownies from their pan is to let them sit in lukewarm water and then cut it with a warm knife, which honestly seems like it'd help out a lot...  I'm frankly embarrassed I didn't think of it first.

I have to say, even for somebody like me, who's not a big sweets person, this is a luscious treat for anybody's sweet tooth.  I was worried it would be sickly sweet, but honestly, it was the perfect combination of rich brownie and pillowy cheesecake.  Topped with whipped cream and maybe a raspberry or two and this could be the perfect dessert...

Now I need to figure out why I've run by Boardwalk Bakery twice, but never actually stopped to eat there.

PS - Like the new plates? A gift from my parents for Valentine's Day.  Woo-hoo TJ Maxx!


~~~~  °o°  ~~~~

Brownie Cheesecake
As is served at The Boardwalk Bakery, Disney's BoardWalk Inn
 
For the brownies:
°o°  2 cups sugar°o°  1 1/4 cups all-purpose flour
°o°  2/3 cup cocoa powder 
°o°  1 1/2 teaspoons salt 
°o°  1/2 teaspoon baking powder  

°o°  5 eggs  
°o°  2 sticks butter, melted  
°o°  1/2 cup semi-sweet chocolate chips

For the cheescake: 
°o°  3/4 cup sugar 
°o°  3 tablespoons cornstarch 
°o°  4 8-ounce boxes of cream cheese 
°o°  1 tablespoon lemon juice 
°o°  2 teaspoons vanilla extract
°o°  2 eggs
°o°  2 tablespoons heavy cream  
°o°  2 tablespoons sour cream
 
Preheat oven to 350 degrees and heavily grease a 13x9x2-inch baking pan.

Sift together sugar, flour, cocoa powder, salt and baking powder.  Add eggs, one at a time, at low speed using an electric mixer, being sure to scrape the sides of the bowl.  Mix until smooth.  Slowly drizzle in melted butter, mixer still on low, and beat until combined and no butter rises to the top of the batter.  Do not overmix.  Gently fold in chocolate chips.

Pour batter into baking pan.  Bake 30-40 minutes, or until a toothpick inserted in the center of the brownies comes out clean.  Set aside to cool to room temperature.

When the brownies have cooled, preheat oven to 325.

Cream sugar, cornstarch, and cream cheese in a bowl using an electric mixer.  Add lemon
juice and vanilla extract.  Then add eggs, one at a time, beating on low until incorporated.  Do not overmix.  Fold in heavy cream and sour cream.

Spread batter over the top of the cooled brownies.  Bake until cheesecake is lightly browned and firm, about 55-60 minutes.  Immediately after removing from oven, run a sharp knife around the edge of the pan to loosen the cheesecake to prevent cracking.  

Cool and then refrigerate at least one hour before serving.

To cut, use a warm knife to make clean cuts, and place brownie pan in warm water bath to help loosen brownies, if needed. 

~~~~  °o°  ~~~~

I've been dancing around doing this recipe for a long time...  While I'm a big fan of cakes, I really don't make them all that often.  They always seem like a major commitment in time and I have this abnormal fear of messing them up.  Plus, I don't have the patience to wait until they're cooled all the way before frosting them.  I know this all sounds utterly ridiculous, but it's true.

But this cake...  Something about this cake sounded so, so good.  I know it has a huge, devoted following of people who swear this is the greatest cake at Disney.  And researching this cake was actually pretty fun.  It's been on the menu forever, and it's gone through numerous updates and changes, so it was neat to see how it's evolved over the years.  I was pretty excited to give this recipe a try.

The downside to a cake that has such a long history is that it has numerous recipe variations (all of which are official), and a lot of them suffer from being scaled from Disney's massive batches to a single batch for the home chef.  The recipe I used is the most recent available and it came out flawlessly in terms of taste, but unfortunately, in order to get 4 layers (like they serve now), it really needs to be doubled.  The recipe as-is (and the way I'm sharing it), is only enough for two, maybe three very, very thin layers.  While this is almost exactly like it used to be served, now it's served with 4 layers. 


I have to say, for somebody who doesn't make cakes, I'm pretty proud of how this turned out.  It's so light, fluffy, and fresh tasting, really unlike any cake I've ever had.  It's spring on a fork.  I did use pink grapefruit because, for some strange reason, I couldn't find white anywhere...  But I love, love, love the color contrast that the pink grapefruit gives, and I know it's not unheard of for it to be served using pink grapefruit at the Brown Derby.  The cream cheese goes brilliantly with the airy cake and the sweet grapefruit, and it's deliciously creamy, without being gooey.  I'm not sure why, but I was so terrified this would fall apart when I sliced it, but it held together brilliantly.  All the little elements of it just meshed together beautifully. 

Had I to do over again, I'd probably keep the pink grapefruit, but I'd double the
recipe (including frosting) and divide it evenly between two pans (or cook this recipe twice) so I'd be able to get those extra layers, and use way more grapefruit.  I was also reminded of how much I hate to frost cakes.  I had way better luck frosting the inside and then frosting the sides and tops after I had my layers assembled.  Not sure if this is the right way to do it, but hey...  It's what I did.  And, for the record, I didn't use the food coloring.

I can completely see why this dessert has stood the test of time and survived several updates to the Brown Derby menu.  It's exotic and clean-tasting, relatively easy to make (though it is time consuming), and it looks really dramatic when sliced and garnished with the pink grapefruit.  This for sure is going into the recipe file I crack out when I want to impress people with my cooking awesomeness.

~~~~  °o°  ~~~~
Grapefruit Cake with Cream Cheese Frosting
As is served at The Hollywood Brown Derby, Hollywood Studios
 
Grapefruit Cake
°o°  1 1/2 cups sifted cake flour
°o°  3/4 cup granulated sugar
°o°  1 1/2 teaspoons baking powder
°o°  1/2 teaspoon salt
°o°  3 large eggs, separated
°o°  1/4 cup water
°o°  3 tablespoons grapefruit juice
°o°  1/2 teaspoon finely grated lemon zest
°o°  1/4 teaspoon cream of tartar
°o°  1 can (16 ounces) grapefruit sections, well drained, dried


Cream Cheese Frosting
°o°  2 packages (8 ounces each) cream cheese, softened
°o°  1 teaspoon fresh lemon juice
°o°  1 teaspoon finely grated lemon zest
°o°  1 cup confectioners' sugar, sifted
°o°  6 drops yellow food coloring (optional)

Preheat oven to 350 degrees.  Lightly grease a 9-inch cake pan or springform pan.  Line the bottom of the pan with parchment paper and lightly grease, if desired (not necessary with a springform pan).  Set aside.

In a large bowl, sift together flour, sugar, baking powder, and salt.  Set aside.

In a separate bowl, whisk together egg yolks (reserve egg whites), oil, water, juice, and lemon zest until smooth.  Combine into the flour mixture, stirring until just moistened.  

In a third bowl, beat egg whites and cream of tartar until stiff peaks form.  Using a rubber spatula or folding tool, fold stiff egg whites into batter until just blended.  Pour into prepared pan.  Tap down pan to help larger air bubbles to rise and ensure the mixture is evenly distributed.
 
Bake for 25-30 minutes or until cake springs back when touched lightly in the center, or a wooden pick inserted in the center comes out clean.  If using a cake pan, invert cake over a wire rack to cool, leaving the cake in the pan.  When cooled, run a knife around the edge of the pan and carefully remove it from pan.  If using a springform pan, run a knife around the edges of the cake, release the springform mold, and cool inverted on a wire rack.  

Using a serrated knife or cake layer cutter, cut the cake horizontally into 2 layers, making sure both layers are even.  
 
Prepare the cream cheese frosting by beating cream cheese until fluffy, adding lemon juice and zest, and gradually adding sugar until blended, as well as food coloring (if desired).

To frost the cake, spread cream cheese over the bottom half of the cake and top with 2/3 the grapefruit slices.  Cover with second layer and frost the top and sides.  Chill for at least 30 minutes.

Before serving, garnish the cake with remaining grapefruit segments, cut, and serve.   

~~~~  °o°  ~~~~
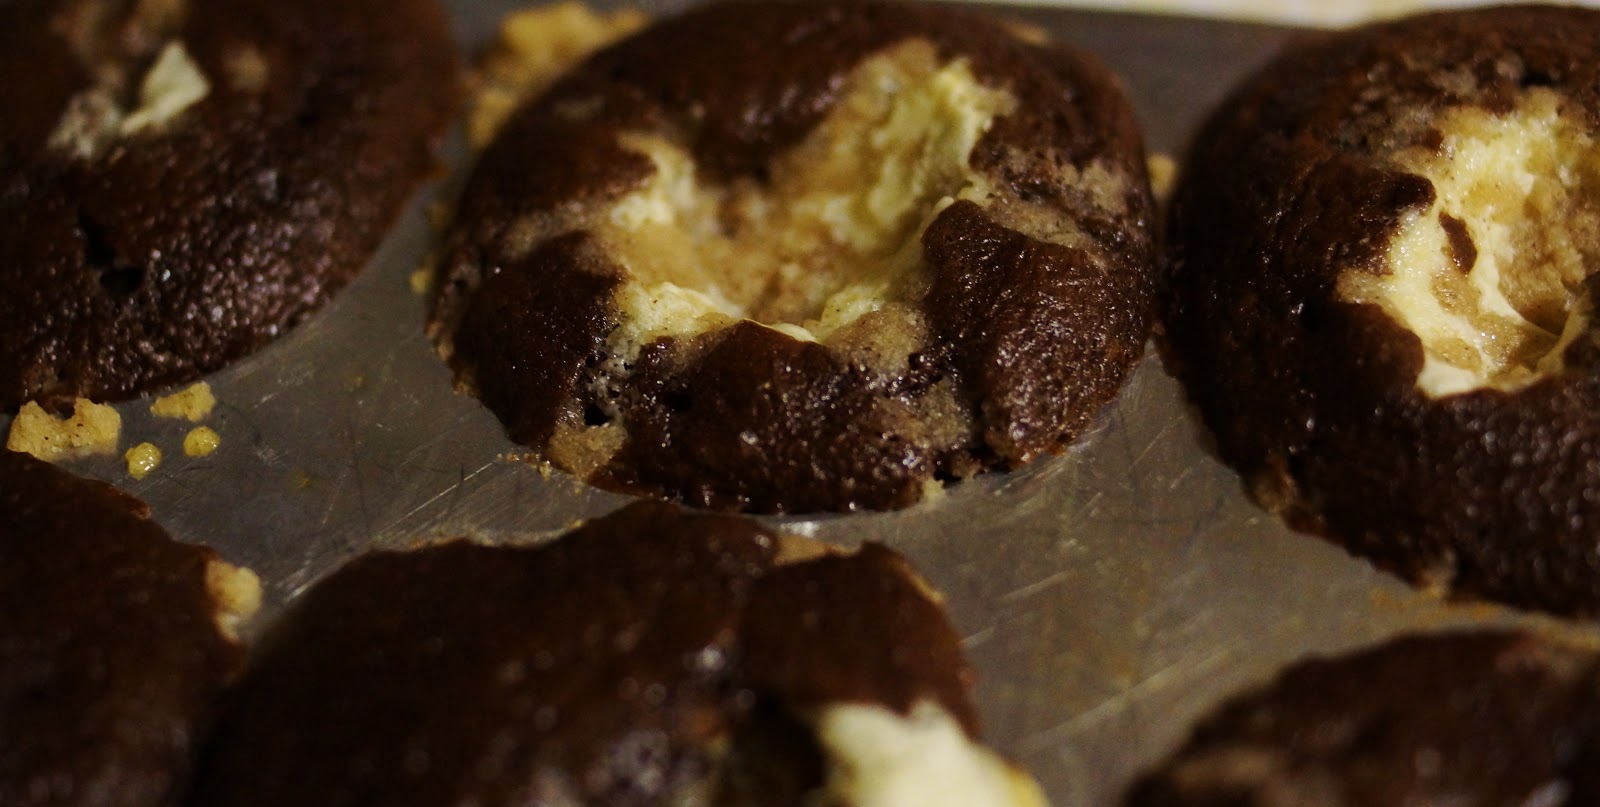
First of all, I have to say that this recipe is one I did awhile ago, but was saving for a special occasion...  But I was so totally blown away by the response I got to the chocolate peanut butter sandwiches that I posted the other day that I decided that I just had to post it.  Turns out everybody is dying for classic, signature recipes that Disney has retired.  The chocolate cream cheese buckle is just exactly that.

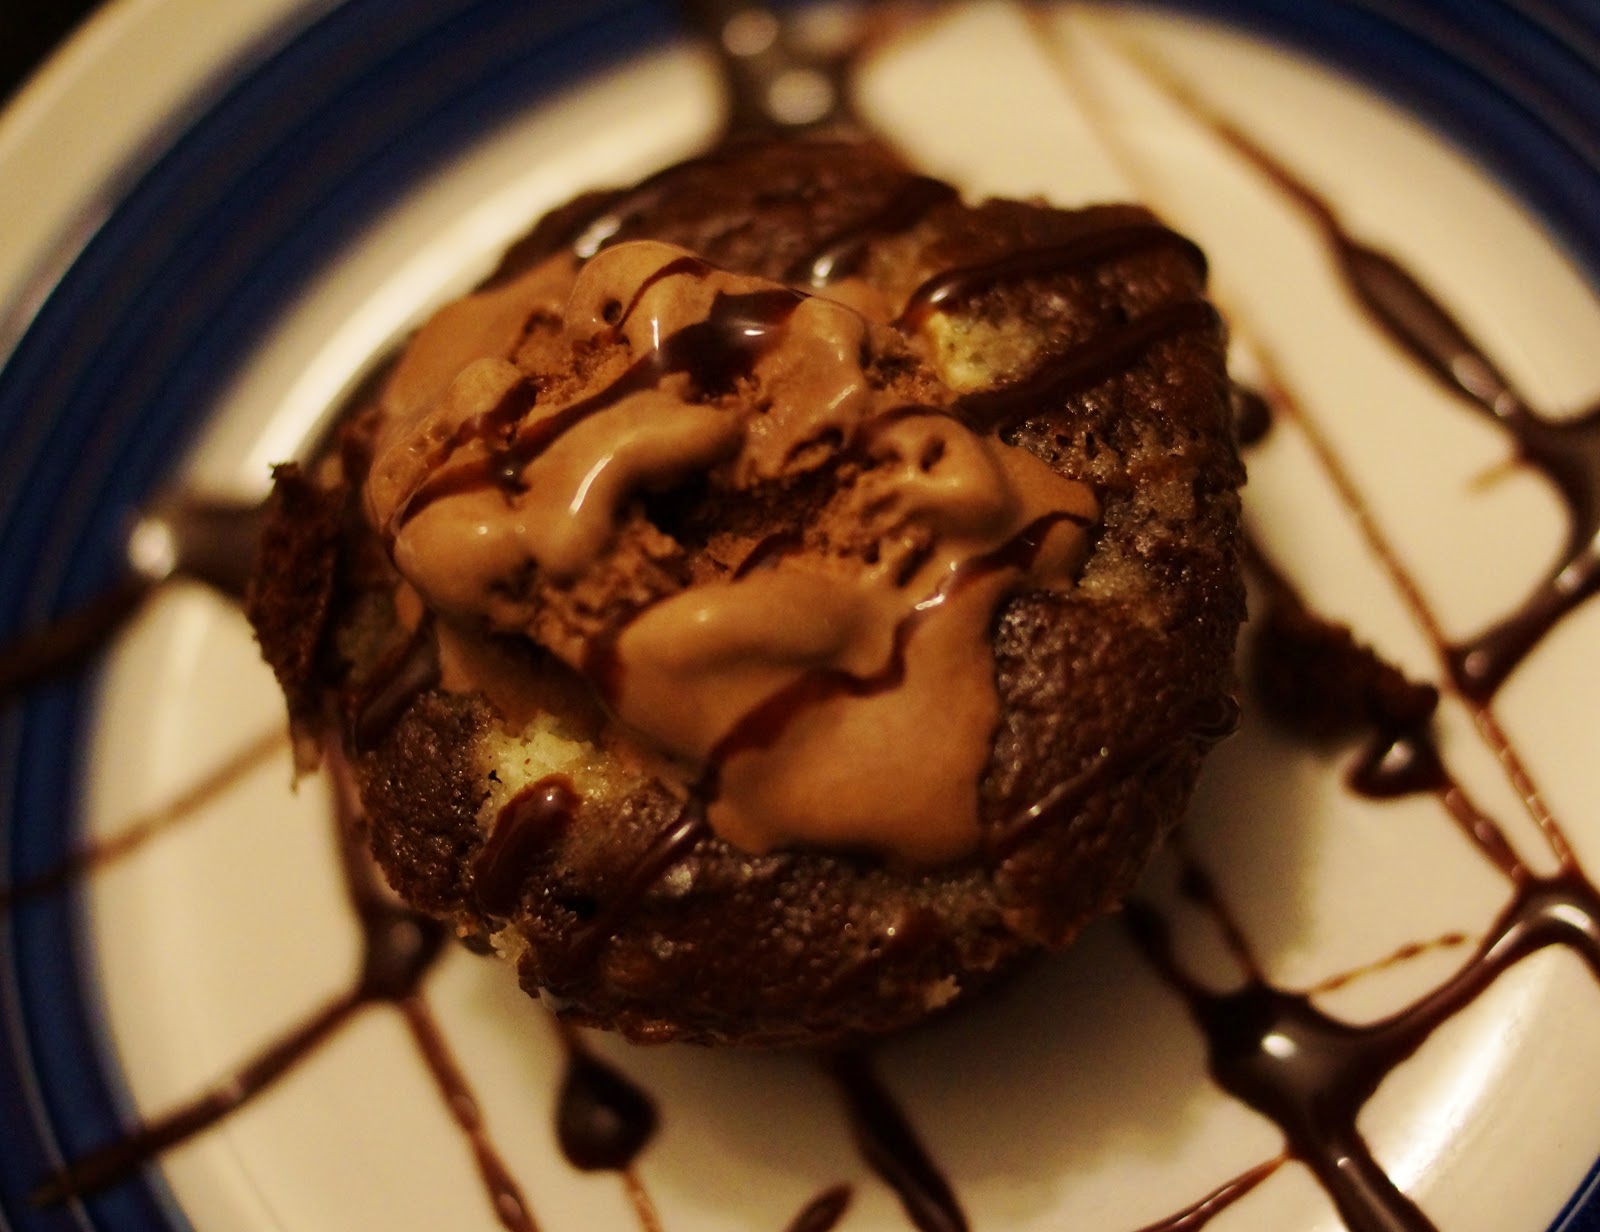
Those lucky enough to have eaten at Cinderella's Royal Table are well aware of this decadent treat, which used to be one of their signature desserts.  I remember a variation of this back when it was King Stefan's character breakfast back in the 90's.  While it was originally served as a warmed muffin, it since evolved from breakfast sweet treat to a full blown, signature dessert that's topped with ice cream and chocolate sauce.  The writing was on the wall for this dish's retirement came when it was removed from the regular menu and made only available for celebrations.  From there, it very quietly was discontinued all together.  While it does occasionally resurface for limited runs, it's no longer a steady regular and nobody really knows why it was pulled from the menu, the the assumptions are that, despite it's popularity, they just wanted a change.


I don't think I even need to say how awesome the combination of chocolate and cream cheese is.  At its absolute best served warm with ice cream, this is a rich, creamy, positively sinful treat and a surefire guaranteed favorite of anybody who condones the overuse of chocolate (as if chocolate could ever be overused).  I'm not even a dessert person, but this made me rethink my stance on overeating at dinner and skipping the treats afterwards.

Luckily for me (but not my diet), this is crazy easy to put together and the ingredients are not at all expensive or exotic.  I actually made this with my 2-year-old and we had a blast.  My only tips for this would be to know that if you're using smaller muffin pans, not the over-sized tins, be sure to not overfill the muffins...  You'll regret it if you do, because these expand like I've never seen a muffin expand and the mess it creates is pretty epic.  This goes hand-in-hand with my next tip: use muffin liners.  I know they don't at Disney, but Disney also has somebody who's job it is to wash dishes.  Unless you have somebody on-staff to do your dishes (or children), or a dishwasher that's a lot more effective than mine, I'd use the paper liners and say the aesthetic difference is part of the business of doing Disney at home.


~~~~  °o°  ~~~~

Chocolate Cream Cheese Buckle
As is served at Cinderella's Royal Table, Magic Kingdom
 
Cream Cheese Filling
°o°  8 ounces cream cheese
°o°  1/3 cup plus 1 tablespoon sugar
°o°  1 egg
°o°  1 teaspoon vanilla extract

Streusel Topping
°o°  1/2 cup sugar
°o°  4 tablespoons flour
°o°  1 teaspoon ground cinnamon
°o°  4 tablespoons butter, softened

Chocolate Cake
°o°  1 boxed dry mix chocolate cake (plus ingredients to make it)
°o°  1 cup semisweet chocolate chips

In one bowl, add all ingredients for the cream cheese filling, mix until combined, set aside.

In another bowl, combine all ingredients for streusel topping with a fork until mixture is crumbly, set aside.

In a third bowl, prepare chocolate cake batter according to instructions.  Fold in chocolate chips.  Set aside.

Preheat oven to 375 and spray muffin pans with cooking spray or line with paper baking cups.  Fill each muffin cup halfway with chocolate cake batter.  Spoon about 1 tablespoon of the cream cheese mixture on the top of the chocolate batter.  Sprinkle with streusel topping.

Bake for 18-20 minutes or until a toothpick inserted in the chocolate cake portion comes out clean.  Cool about 10 minutes before removing from pan.

If desired, remove from paper liners, serve warm, topped with ice cream, chocolate syrup, and additional chocolate chips. 
~~~~  °o°  ~~~~