Showing posts with label Disneyland. Show all posts

I'm sure everybody has seen the picture of the mac-and-cheese and bacon topped cones that were posted on The Disney Food Blog last week.  They went viral on Pinterest, Walt Disney World food sites, even mainstream media (People Magazine had an article about them!).  The indulgent decadence of these cones fascinated everybody and people were scrambling to figure out how to get them in the parks.

Served only at the food kiosk within Hollywood Studio's "Fantasmic!," apparently these cones were a feature all summer at only that one location.  Despite having choice between bacon topped mac-and-cheese and "Fiesta Chili Cheese," these flew under everybody's radar for almost three months before they were discovered.  And, in a cruel twist of fate, only days after they were featured at The Disney Food Blog, they were quietly removed from the menu...  Meaning just as the cone was going viral and their demand was about to skyrocket, they were retired.  According to one cast member it was simply due to the lack of demand.  It wasn't until after their photo went viral that people started clamoring for them.  Oh macaroni and cheese cone, you were gone too soon!

I've been flooded with requests on how to make these cones in the last few weeks, from people who aren't getting to Disney in the near future, to people who went and sadly found they had just missed their chance to order it.  Believe it or not, I actually got a Tweet from somebody sitting in Fantasmic! saying "At Fantasmic now. They're not here anymore! Help @orangebirdswirl! Tell me you have the recipe! I NEED THIS!!!!!!!!!"

Well, first the bad news.  These cones?  They're not made on property.  That's right...  They're this company.  The good news?  I've got a relatively easy way to do a version of it at home.  While not officially what they serve at Walt Disney World or Disneyland (where you can still find versions these cones), it's pretty close.  To say they were a huge smash hit in my house is an understatement.
ordered in from, as best as I can tell,

Today I'll share a "how to" for the cones, then Wednesday I'll share the recipe for the bacon mac-and-cheese (using a version that was once on the Sci-Fi Dine-In Theater) and chili on Thursday.

My only tip is to make sure you allow enough time for it to rise while it's sitting on the cones.  If you don't, it will be a bit chewy.  Secondly, these are best warm.  Serve them fresh out of the oven or re-warm them in the oven or toaster oven.  Otherwise they're a bit chewy regardless of how long they were rising for.

So, no need to mourn the loss of the mac-and-cheese cone...  Ok, that's not true.  Mourn away.  I know I am.


~~~~  °o°  ~~~~
Bread Cones
In the style of what's served at the Cozy Cone Motel, Disneyland, and the Fantasmic! Concession Stand, Disney's Hollywood Studios
 
°o°  2 bags of premade pizza dough, thawed  
°o°  1 egg, beaten  
°o°  Salt, to taste  
Remove dough from freezer bags and allow dough to rise about 45 minutes to an hour.  

While the dough is rising, using stiff cardstock, roll cardstock into a large cone.  Use a staple to secure the top of the cone (don't staple the bottom, it'll crush the cone) and trim excess paper.  Wrap with aluminum foil, folding the ends of the aluminum foil over the edge of the cone (to prevent the scorching of the paper).   Repeat with 5 additional pieces of paper, making a total of 6 cones, covering all with foil.  Spray liberally with non-stick spray.

After dough has risen, punch down and cut each dough ball into three equal pieces (you will have 6 pieces of dough all together after cutting both balls of dough).  Working with one piece at a time on a very lightly floured surface, roll dough into a long, even, dough rope.  Lightly press the dough rope so it is slightly flattened.  Beginning at the pointed end of the foil cone, wrap up the cone, making sure that the dough touches or very lightly overlaps over each coil.  Tuck the end in on itself after coiling up the cone.  Pinch the pointy end of the roll to seal shut.  If desired, press and smooth the dough so that is thin and even up the cone.

Stand the cones, point side up, on two foil lined baking sheets.  Repeat with the remaining portions of dough.  Cover and allow dough to rise again about 30-45 minutes.

Preheat oven to 350 degrees.

After dough has risen again slightly, brush each with the beaten egg wash and dust with a pinch
of salt.  Lay them on their sides of greased baking sheets for baking.  Bake in a 350 degree oven until done and the cone is a golden brown color, about 25-30 minutes (but start checking at about 15-20 minutes...  It browns quickly!).  Remove from oven and allow to cool on the cones for about 2 minutes.  Carefully remove and serve immediately.

Stuffing ideas include mac-and-cheese, chili, scrambled eggs, salad, cheesesteak, shrimp, or seasoned ground beef.

~~~~  °o°  ~~~~


I shared this recipe during my first video last week and I know I'm a bit late with the written followup, but hey, better late than never, right?

I'm sure most people who're on Pinterest have seen this recipe...  It one of the most pinned recipes of 2012 and 2014 and it claims to be the recipe for the best cornbread out there.  And what makes this recipe ridiculously unique is that it involves the use of golden butter yellow cake mix.  Now, I'm not sure if this recipe is truly a genuine Disneyland recipe (I can't find information online confirming it is or isn't used at Disneyland, I've got several recipes from Disneyland that don't use cake mix), because it's so popular, so widely shared, and because I had all the ingredients in my pantry, I figured "why not?"

This recipe couldn't be any easier.  Basically, you make the cornbread and the cake mix in separate bowls according to the package directions, combine the batters, then bake.  Seriously, that's it.  How easy is that?

"Authentic" Disney recipe or not, this cornbread is phenomenal.  Mixing it all together made my kitchen smell like a birthday party...  So delicious.  Then baking it?  Yankee Candle needs to come to my house, smell how amazing it smells, then make a candle.  This amazing combination of butter and warm cornbread.  The cornbread itself...  Oh...  My...  Goodness.  Incredible.  Absolutely spectacular.  For sure my go-to cornbread recipe from now on.  It's moist, soft, flavorful, and it melts in the mouth like butter.  It doesn't crumble and, unlike a lot of cornbread recipes I've used, it doesn't crumble to bits when you cut it.  Thank goodness this recipe makes a ton of cornbread because less than 10 minutes after pulling it out of the oven more than half of the first loaf I made was gone.

While researching this recipe, I found a lot of suggestions saying that when picking the cake mix that the mix without pudding in the mix works the best.  I ended up getting a mix with the pudding in it because I couldn't find anything else.  Apparently it makes the cornbread too sweet, too cake-like with its flavors.  Personally, I didn't find it to have the taste or texture of cake and I didn't think it was too sweet at all.  That said, for those who may want a more savory version, see if you can find the Jiffy Yellow Cake Mix and use that instead (if using the Jiffy Yellow Cake Mix, use one box of cornbread mix to one box of the yellow cake mix as opposed to two boxes as directed below).

This cornbread is incredible.  I consider myself a cornbread connoisseur (it's one of my favorite carbs)...  If I see it in a menu, I order it.  I make it all the time.  And this version of cornbread is hands-down my favorite.  I'm already thinking about when I can make it again.

For those interested in watching how I make this recipe I did make a video, the first of what I hope are many upcoming webisodes for the website!


~~~~  °o°  ~~~~

Disneyland's Famous Cornbread
As is supposedly served in Disneyland
 
°o°  2 boxes of Jiffy Cornbread Mix
°o°  Ingredients listed on the back of the boxes to prepare EACH BOX of cornbread as directed 
°o°  1 box of Yellow Butter Cake Mix  
°o°  Ingredients listed on the back of the box to prepare cake as directed  
Preheat oven to 350 degrees.

Prepare the Jiffy Cornbread Mix as directed (since two boxes are being used, prepare each as
directed, essentially doubling the recipe).  Combine ingredients but under mix the batter slightly.  Set aside.

In a separate bowl, prepare the Yellow Butter Cake Mix as directed, undermixing the batter slightly.  Combine the prepared cornbread batter with the prepared cake batter and mix thoroughly while being careful to not overmix.  Pour into greased 9x13 pan (or loaf pans, but fill only slightly over halfway...  This rises considerably!) and bake for 30-35 minutes or until bread is golden, springs slightly to the touch, and a wooden stake inserted in the center comes out clean.

Cool slightly before removing from the pan and cutting.


~~~~  °o°  ~~~~

 When I hear somebody mention Minnie's Bakeshop Cookies, my mind fills with a thousand memories from Walt Disney World.  I think of the Pop Century food court, walking past racks stuffed with these massive cookies, resisting the urge to grab a package or two.  I remember the horror of realizing I had leftover snack credits at The Polynesian Village and grabbing an armload of these red and white packaged cookies to take home.  I remember coming home after an adults-only trip and handing out packages to the kids and hearing the sound of the plastic crinkling and crunching as they held their baked treasures like gold with huge smiles.  Believe it or not, I actually have a cookie that I "forgot" about in the luggage, that had just expired and wasn't edible...  So I put it with my Disney memorabilia.  Yes, I have a hockey puck-like wrapped cookie that expired in 2011 displayed right next to Mickey ears in my bedroom.

And it'll probably make more than a couple of people laugh when they hear that despite all the memories I have of these monstrous, quarter pound cookies, and how completely tied to Disney they are in my mind, I think I've eaten only one.  What can I say? I'm not really a cookie person.

I'm sorry if I'm ruining anybody's illusion but these cookies, despite the name, aren't actually made by Minnie.  They're not even made on-site.  They're bought in by a company called Selma's Cookes, Selma also providing baked goods to everybody from Barnes and Noble and BAM to Gloria Jean's Coffee.  In fact, my son's first cookie ever was a Selma's Cookie...  A Snickerdoodle bought at Borders Books.  Anyway, they have a ton of flavors, everything from Chocolate Supreme (which has like 4 different types of chocolate chips), Oatmeal Raisin, and occasionally even an M&M one can be found out and about in Disney World.  And lucky for us, they were nice enough to make available a recipe for their "mix-in" cookies (the cookies they add things to) as well as their Snickerdoodles.  The recipe I'm sharing is their at-home version of their popular Raspberry White Chocolate Cookies. 

Yes, that does taste as amazing as it sounds.

While these cookies aren't hard to make, they do require a lot more babysitting and knowledge of how your oven works in order for them to turn out correctly.  For example, the recipe calls for 2 minutes at 400 degrees, 15 at 350...  Well, my oven (which is older than my kitchen...  Not even joking) can't do that.  It hits 400, it's going to stay at 400.  After a first batch that was far-from-perfect, I figured out that what worked best for my oven was 4 minutes at 400, 10-12 minutes between 325 and 350.  So as I said, prepare to watch the first batch or two like a hawk to make sure it cooks right.

Now...  Size...  The recipe calls for 1/2 cup raw dough per cookie.  Well, I did that, I got
hubcap sized cookies.  When I aimed for a happy medium of between 1/4 and 1/3 cup dough per cookie, I got a cookie more about the size of what Minnie ships out from her oven.  The key is to make sure they're really mounded, appropriately chilled, and you'll get a big, thick cookie.

The fun thing about these cookies is, fresh out of the oven, they're these soft, velvety, gooey cookies with the texture of butter.  They almost melt in your mouth the second they hit your tongue.  While pretty much the best tasting cookies of all time, they were definitely more chewy than the Minnie's Bakeshop version.  However, after being left to cool overnight (wrapped, of course), these cookies became a dead ringer for Minnie's Bakeshop Cookies.  Dense, not too chewy and not too crunchy, with a little bit of crumble, while still keeping the soft texture.  Personally, I like my cookies with crunch so I know this is sacrilegious to say, but I think these cookies are best enjoyed completely cooled.  For anybody who has the patience to wait that long, I promise...  You'll end up with a cookie so close to the in-park version of the cookie, you'll have family members digging through the trash to try and find the Minnie's Bakeshop wrappers. 

I did make two changes to this recipe, aside from the baking time and size notes above.  Because I live in rural NH and apparently white chocolate chunk chips are completely foreign to our grocery stores, I did substitute the white chocolate chunks for white chocolate chips.  Frankly, I prefer chunks but what are you going to do.  Secondly, I used seedless raspberry preserves.  I know that's what the recipe calls for below, however, that's not what Selma's uses.  Their swirl is something proprietary (for those who don't watch "Shark Tank" that is a fancy word for "it's a secret"), so the raspberry preserves is the suggested replacement.  Try to stick with seedless and if you use jam, be prepared to tweak the amount a bit.  You want enough of a swirl that you can taste the raspberry, but not so much it makes your cookies watery.  A lot of knowing how much to add has to do with how the dough looks since he portion is done by ounces.  Just make sure that you add and swirl enough that you can see the swirl, but not so much that the dough isn't firm and could be rolled into a sticky ball.  It shouldn't be crumbly, watery, or liquid.  Be aware...  These cookies can get pretty sticky, even after they're baked.  But as we all know, the messier the cookie, the better.


~~~~  °o°  ~~~~

Minnie's Bakeshop Cookies - Raspberry White Chocolate
As is found at Walt Disney World, Disneyland, and associated resort hotels and gift shops
 
°o°  1 cup butter, room temperature, sliced by tablespoon (to aid in mixing)
°o°  1 cup light brown sugar, packed
°o°  3/4 cup confectioner sugar (this cannot be substituted for granulated sugar)

°o°  1 egg
°o°  1 tablespoon water
°o°  1 teaspoon vanilla extract
°o°  1 teaspoon raspberry extract
°o°  2 3/4 cups flour (up to 3 cups if consistency is still to wet)
°o°  1 teaspoon salt
°o°  1/2 teaspoon baking powder
°o°  1 cup white chocolate chunks
°o°  1 cup raspberry flavored chocolate baking chips, semi-sweet (regular semi-sweet can be substituted)
°o°  10 ounces seedless raspberry preserves
 
Combine butter, sugars into large mixing bowl and beat until creamy.  Add egg, water, and extracts.  Continue to cream until all of the liquid is absorbed into the dough.  Slowly add flour, 1/2 cup at a time.  If, after 2 3/4 cups of flour, dough is still too soft to handle, add up to 1/4 cup additional flour.  Dough should be very dense and stiff, but not dry or crumbly.  Add white and chocolate chips, mixing to distribute evenly in the dough.  Divide dough into 4 batches.

Working with one batch of dough at a time (refrigerating the dough not being worked with) add about 2 ounces of raspberry preserves to the dough and cut the preserves into the dough to create a swirl.  Do not mix the dough or the swirl effect will not be achieved and cookies will turn pink.  Using a measuring cup or ice cream scoop, scoop dough into balls and place on a plate.  Put cookies in freezer and freeze for 15-25 minutes.  This will allow the cookies to bake without spreading.

Preheat oven to 400 degrees.

After 15-25 minutes in the freezer, place cookies on a parchment or foil-lined baking sheet (if using foil, grease pan generously).  Bake cookies at 400 degrees for 2 minutes.  After two minutes, lower temperature to 350 and bake for 14-17 minutes or until done.  Remove cookies from oven, allow to cool on pan for 10 minutes before transferring to a wire rack to cool for another 15-30 minutes.

Repeat process with remaining portions of dough.

Makes between 12-14 cookies.


~~~~  °o°  ~~~~
Today's recipe is something of a milestone...  Believe it or not, this is,  hands down, without a doubt the recipe I get the most requests for.  Seriously.  More than Dole Whips, Le Cellier Soup, and The Grey Stuff combined.  Literally, there was a point where I was getting a request for the recipe to these simple little cookies once or twice a week.  Even as I type this, I check my inbox on Facebook to see not one, but two more requests from fans for these cookies  I can't explain it
I'll admit, for a period of time I thought these requests were from the same couple of people (most likely related to The Cookie Monster in some way) made over and over and over again, but a quick little search on Google shows that these bad boys are the center of many a recipe request online, from Yahoo! Answers to Facebook and Disney food-related websites.  For some reason, these little cookies have quite the cult following.

So why didn't I share the recipe before now?  Well, quite simply...  I didn't have it.  And despite all claims to the contrary, very few had what could be nailed down as the legitimate, one-and-only famous Disney Snickerdoodle recipe.  Again you may ask why...  The reasons, as best I could uncover anyway, was because for the longest time the cookies were not made by Disney.  They were brought in pre-made and pre-cooked (or pre-made but frozen for quick baking) from an outside vendor.  I know this is an earth-shattering revelation for many, but it's true.  Even at places where you could find them on a rack, safely tucked on wax paper behind the sparking glass of the bakery display case, the chances were high that sweet looking little cookie was made somewhere other than Minnie's on-site bake shop.

Then sometime in the last 10ish years, Disney switched back to making these on-site again
(in limited batches, available only in certain spots).  But when it came to handing out the recipe, there were still roadblocks to overcome.  The measurements they used were designed for batch sizes in the hundreds.  As one can imagine, condensing down a recipe that makes 500+ cookies to a more household chef-friendly batch of 24 presents specific challenges.

After developing a "sorry, I don't have the recipe for Disneyland's Snickerdoodles" form letter (again, not joking), I kind of gave up the idea of ever nailing down this treat.  Such is the way with many Disney baked goods...  The home chef version of the recipe was just not meant to be.

Then, a breakthrough.  I was looking for an email that I thought landed in my SPAM box and I just happened to find a message from Disney Guest Relations.  Inside, the practically perfect and ridiculously pleasant response by one of the fantastic folks at Disney, happily sharing Disneyland's Snickerdoodle recipe.  Um.... Whaaaat?  I didn't even remember sending the email that asked for the recipe.  I was stunned, but thrilled.  Oh and by the way, the email they replied to was sent 6/28/2012.  That's right, they replied to an email I sent two years ago asking for this recipe.  Am I the only one who thinks that's amazing?

After getting this recipe from Disney, a recipe people have been asking me about for years, an easy recipe with no exotic or expensive ingredients, a recipe that happens to be my son's favorite type of cookie, you'd think I dropped everything and rushed to make it.  Think again.  Actually, I sat on it for another two or three months before deciding to try it out today.  Because I'm just awesome like that.


I won't go into great detail about this because apparently everybody but me was on the "these are the most amazing cookies of all time" bandwagon well before me.  Needless to say, these cookies are pretty darn amazing, they're easy to make, and they're even easier to sit down and eat.  No real tricks to this, other than to make sure the butter is room temperature, not cold or melted.  Also, trust the timing on these...  The recipe says 8 minutes, but on my first batch, I was expecting something more browned so I left them in for 12 minutes.  They were good, but crunchy, and they never got browned like I thought they would.  The next batch I left in for exactly 8 minutes, and even though every fiber of my body screamed that they were underdone...  Actually, they were perfect.

And, I'm happy to say, this recipe allows me to use one of my few baking "tricks."  When it comes to rolling and then flattening these cookies, it's hard to get that perfect "smush," where the cookie's thickness is even, it's round, and there are no unsightly fingerprints on the dough (which also show up on the cookie after it's baked).  My solution?  Use the flat bottom of a glass or cup to smush the cookies.  I actually used one of those retro-style Coke fountain glasses from the dollar store.  I got perfectly smushed cookies every time.     

So, here it is, after years of waiting, multiple requests, and countless hours of research thwarted by Disney's reply to an email sent several years ago...  The recipe to the Disneyland Snickerdoodle. 

Now here's hoping all the people that requested this over the years don't stop reading the website because I granted their wish.  Maybe if I drop the bombshell that I have the Minnie's Bakery chocolate chip supreme recipe people will hang out for another couple of years until I decide to try that one out?


~~~~  °o°  ~~~~

Disneyland Snickerdoodles
As is served at Disneyland
 
°o°  2 sticks of butter
°o°  2 cups granulated sugar  
°o°  1/2 teaspoon salt  
°o°  2 eggs  
°o°  1/4 cup milk 
°o°  1 teaspoon vanilla 
°o°  3 1/2 cups flour
°o°  1/2 teaspoon baking soda
°o°  1/2 teaspoon cream of tartar

For topping:
°o°  6 tablespoons granulated sugar 
°o°  1 tablespoon cinnamon
Preheat oven to 375 degrees.

Cream together using a blender butter and sugar until light and fluffy.  Add eggs, one at a time, milk, and vanilla.  Mix very well so that all ingredients are incorporated and there is no standing liquid in the bowl.  

Combine flour, baking soda, cream of tartar, salt, and sift.  Add, about one cup at a time, to the wet ingredients, mixing well after each addition and scraping sides as needed.

Combine topping ingredients on a separate, small plate.

Roll dough into 1-inch balls and then roll into the sugar and cinnamon mixture so all sides are covered with the sugar mixture.  Place on a greased baking sheet (or a sheet lined with parchment paper) and flatten into disks.  Sprinkle additional topping on the cookies.

Bake in preheated 375 degree oven for 8 minutes, or until cooked through.   


~~~~  °o°  ~~~~

If there was ever a recipe that I was surprised turned out well, it'd be this one.  I've made pancakes and I've made puff pancakes, so I knew kind of what to expect...  But the ingredients on this one looked so different than puffed pancake recipes I've known, I was convinced that this would turn out a big, apple-flavored, flour brick.  Lots of flour, no baking soda or powder...  There was no way this was turning out right.

I have to say, I'm amazed...  Not only did this come out darn near perfect, I can't imagine this could have come out tasting any better.  It was so delicious and soul-warming, I wish I'd made more.  A hit with all the kids, even the ones who hate eating cooked apples, I'm adding this to my regular "breakfast for dinner" recipe rotation.

This recipe is another recipe with a history, which I love.  Versions of this pancake have been featured everywhere from Biergarten's buffet as a dessert in the 80's and 90's, to the Carnation Cafe in Disneyland, as a breakfast treat at The Crystal Palace's massive buffet, even topped with ice cream at Liberty Tree Tavern.  While it's not found anywhere in Disney World as of right now, it does still occasionally appear in the oddest of places.

There is no special trick to this recipe, beyond just having faith that it'll work out beautifully.  A combination of eggy-fried dough and apple pie that's not too sweet, it's definitely worth the experimentation.  Just watch the baking times...  It's hard to nail down the exact time that this will be done as a lot of it depends on the size of the eggs used.  While 20-30 minutes seems like a fair estimate, this could be done in as little as 15 or as much as 35 or 40.  Key thing is, when it's done, you'll know it.  It'll be golden brown, puffed, and smell like an apple pie.


~~~~  °o°  ~~~~

Puffed Apple Pancake
As was served at Carnation Cafe, Disneyland, The Crystal Palace, Magic Kingdom, and Biergarten, Germany Pavilion, EPCOT 

For Apples:
°o°  1 tablespoon butter
°o°  1 cup chopped or sliced, peeled apples
°o°  1 tablespoon lemon juice
°o°  1 tablespoon brown sugar 
°o°  3 tablespoons granulated sugar
°o°  1 tablespoon cinnamon
°o°  1/8 teaspoon nutmeg
 
For Pancake:
°o°  3 tablespoons butter 
°o°  3 eggs
°o°  2/3 cup milk
°o°  1/4 cup flour
°o°  1/2 teaspoon vanilla extract
°o°  1 cup chopped or sliced, peeled apples, cooked
°o°  3 tablespoons brown sugar
°o°  1 tablespoon cinnamon


Preheat oven to 400 degrees.  Melt butter in a pie pan or cast iron skillet in the warming oven, being sure it does not burn.

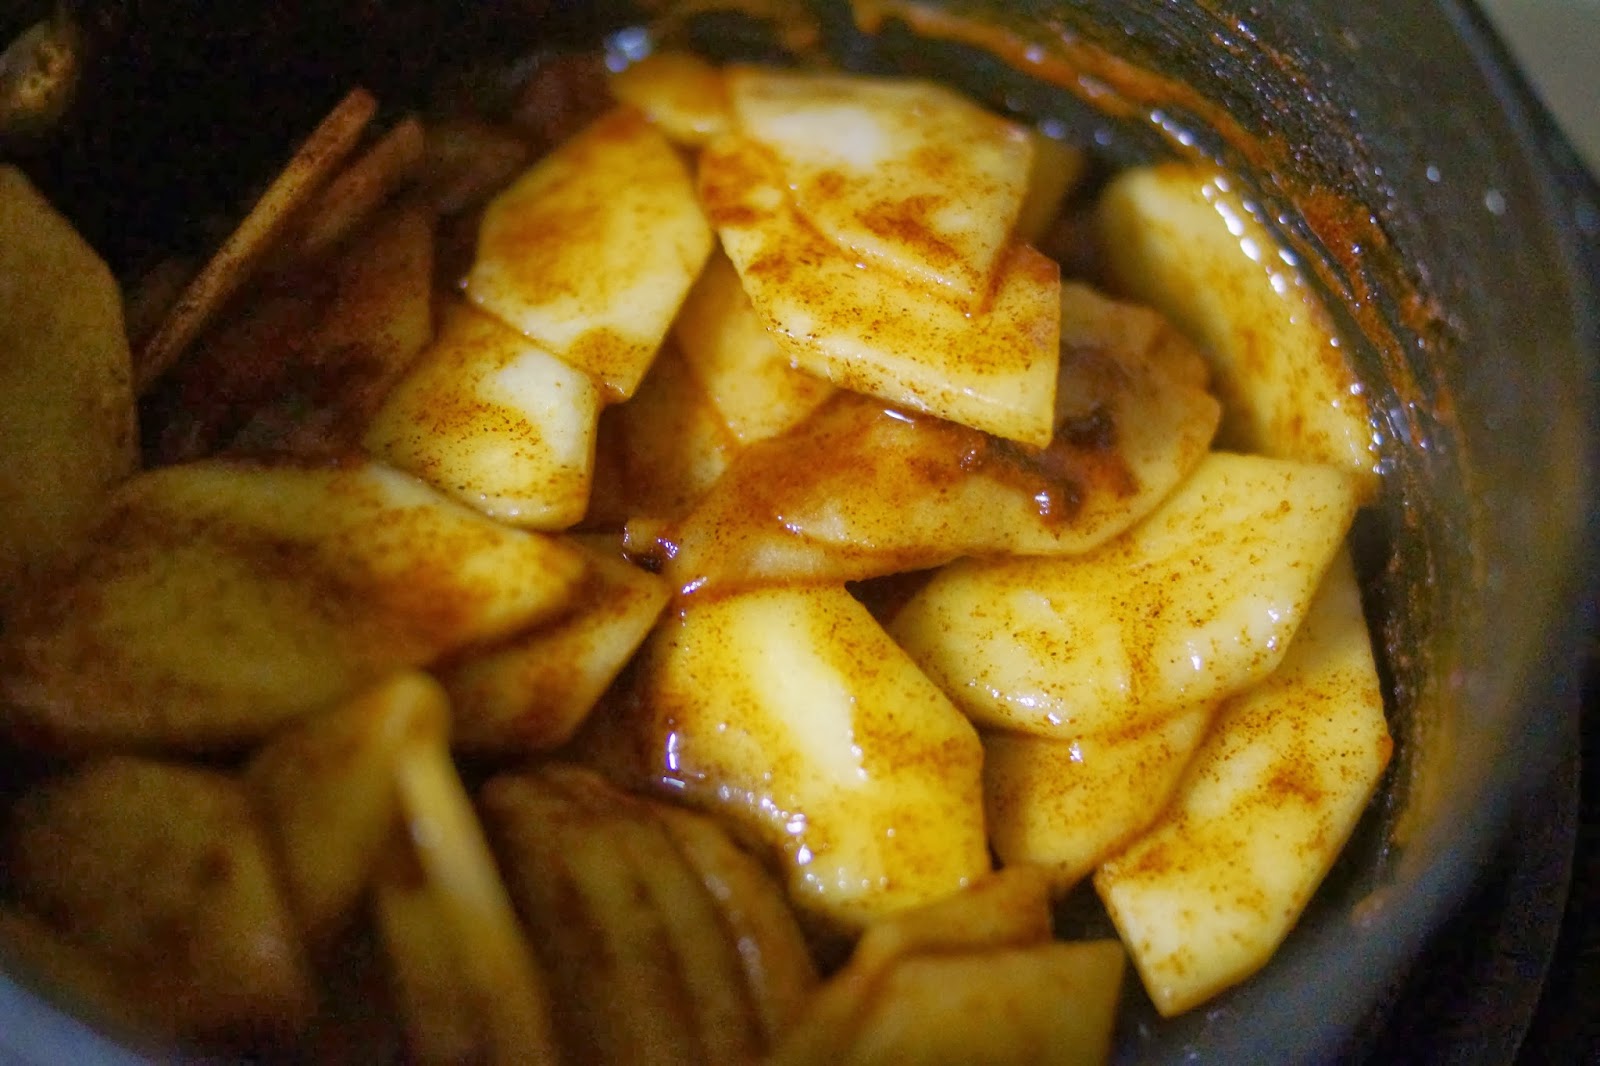
Prepare apples first by melting butter in 10-inch pan over medium heat.  Add apples tossed in the brown sugar, granulated sugar, cinnamon, and nutmeg.  Cook until tender, about 4 minutes.  Remove from heat and pour into a bowl to cool.  Set aside.

In a large bowl, whisk eggs and milk, then sift in flour, whisking until very well combined.  Add vanilla extract.

In a small bowl, combine brown sugar, cinnamon.  Set aside.

Pour mixture into pie pan or cast iron skillet with melted butter.  Top with apples. 
Remove the pie pan from the oven and pour in mixture. Top evenly with the apples, trying to keep them towards the middle of the pan.  Evenly sprinkle the brown sugar and cinnamon mix over the pancake.


Return pan to the warmed oven and cook 20-30 minutes, or until puffed and golden brown.  Serve immediately by slicing as you would a pie, topping with maple syrup or vanilla ice cream. 

~~~~  °o°  ~~~~
Up north they're called corn fritters, down south, hush puppies.  Up north, we serve them with maple syrup or honey butter, down south, Cajun seasoning, Old Bay, or spicy butter.  It's a compliment to seafood bakes, a delicious fair snack, or just old-fashioned comfort food.  Who doesn't love hush puppies?

I'm actually pretty pumped to share this recipe...  This is a recipe that has history to it, and at this point, I think everybody knows how I feel about Disney recipes with a story.

Hush puppies were a favorite of Walt's.  Who can blame him?  They're pretty awesome.  And when it came to opening Disneyland, hush puppies were available at kiosks and food carts, and as a staple at the Blue Bayou Restaurant (where, last I checked, they're still available and are to that restaurant what cheddar cheese beer soup is to Le Cellier).  In California, these distinctly southern cowboy treats were all but unheard of, and it turned out people couldn't get enough of them.  What a lot of people didn't realize was that the recipe they used was a variation of Walt's own recipe. How cool is that?!


When it came to opening Walt Disney World, hush puppies were also initially available at carts and as treats at various snack counters in Frontierland...  And what was immensely popular at Disneyland were all but untouched at Disney World.  The best anybody could guess is that hush puppies just weren't the culinary novelty that they were in Disneyland and people weren't interested in buying at a park what they had pretty widely available outside of the park (apparently even McDonalds, for a time, served hush puppies in some of their southern locations).  Over time, the hush puppies were phased out, having been replaced/eclipsed in popularity by other classic Disney foods (turkey legs, anybody?).

Of course, in classic tourist fashion, as soon as they were phased out, people started to miss them and ask for them back.  While they were never fully integrated back into the park, people still sought them out.  Right now, they can still be found very rarely as a treat at snack kiosks in Frontierland.  However, a variation of the same recipe (only with corn and chives) can be found at lunch at Trail's End, and they're also featured at Narcoossee's seasonally (typically spring and fall) as an appetizer along with a shellfish bake.  Reports of the return of the hush puppy tend to spread like wildfire across Disney food forums and snack credits tremble at the idea of their re-introduction back into the park.

This recipe is the same basic recipe that's used for hush puppies across all the parks and park-owned/operated restaurants.  The nice thing is that they're super duper easy to make, almost impossible to mess up, and not messy to eat.  Which was great for my son who started hovering when the first batch hit the oil, and scurried in periodically when he thought some of the latest batch was cool enough to swipe eat. 


~~~~  °o°  ~~~~

Walt's Favorite Hush Puppies
As was served around Walt Disney World, with variations served at Trail's End Resteraunt at Ft. Wilderness Resort and Narcoossee's at The Grand Floridian Resort and Spa
 
°o°  1 cup flour
°o°  1 cup cornmeal
°o°  1 tablespoon diced shallot
°o°  2 tablespoons finely chopped bacon
°o°  1 1/2 teaspoon chipped parsley
°o°  1/4 cup corn, fresh, frozen, or canned 
°o°  1 1/4 teaspoons baking powder
°o°  2 teaspoons sugar
°o°  1 1/2 teaspoon fine/table salt
°o°  1/2 teaspoon black pepper
°o°  1 egg
°o°  1 cup milk
°o°  Oil or shortening, for frying
Preheat oil to a steady 350 degrees.  Meanwhile, in a large mixing bowl, combine all ingredients but egg, milk, and oil.  In a separate, small bowl, combine the egg and milk and beat until a light yellow color.  Just before frying, add wet to dry ingredients and mix well.  

Using a small spoon, scoop out about a tablespoon of dough and fry in the oil until golden brown on all sides, about 3 to 4 minutes, turning once to ensure even browning.  Remove from oil and drain on paper towels.  

Serve warm, drizzled with butter or maple syrup, or tossed in Cajun seasoning.  


~~~~  °o°  ~~~~

I picked a really bad week to be allergic to peanut butter.

Ok, so I can't pick being allergic to peanut butter, but the truth of the statement still stands...  This isn't a great week to have a peanut allergy in my house.  It feels like everything I've made lately has peanuts or peanut butter in it.  An even bigger bummer as everything I've made looks utterly fantastic.

The recipe today is a total throwback.  While it's something that's still around occasionally in Disneyland, it used to be one of Disney World's signature treats at the Main Street Bakery and Starring Rolls at the former MGM and has since been retired.  I have heard that you can rarely find them around in the fall, especially around Halloween, but despite their cult status as a treat that rivals Mickey ice cream and rice treats, it hasn't been found reliably around WDW in about 10 years and Disneyland started phasing them out about 5 years ago. 

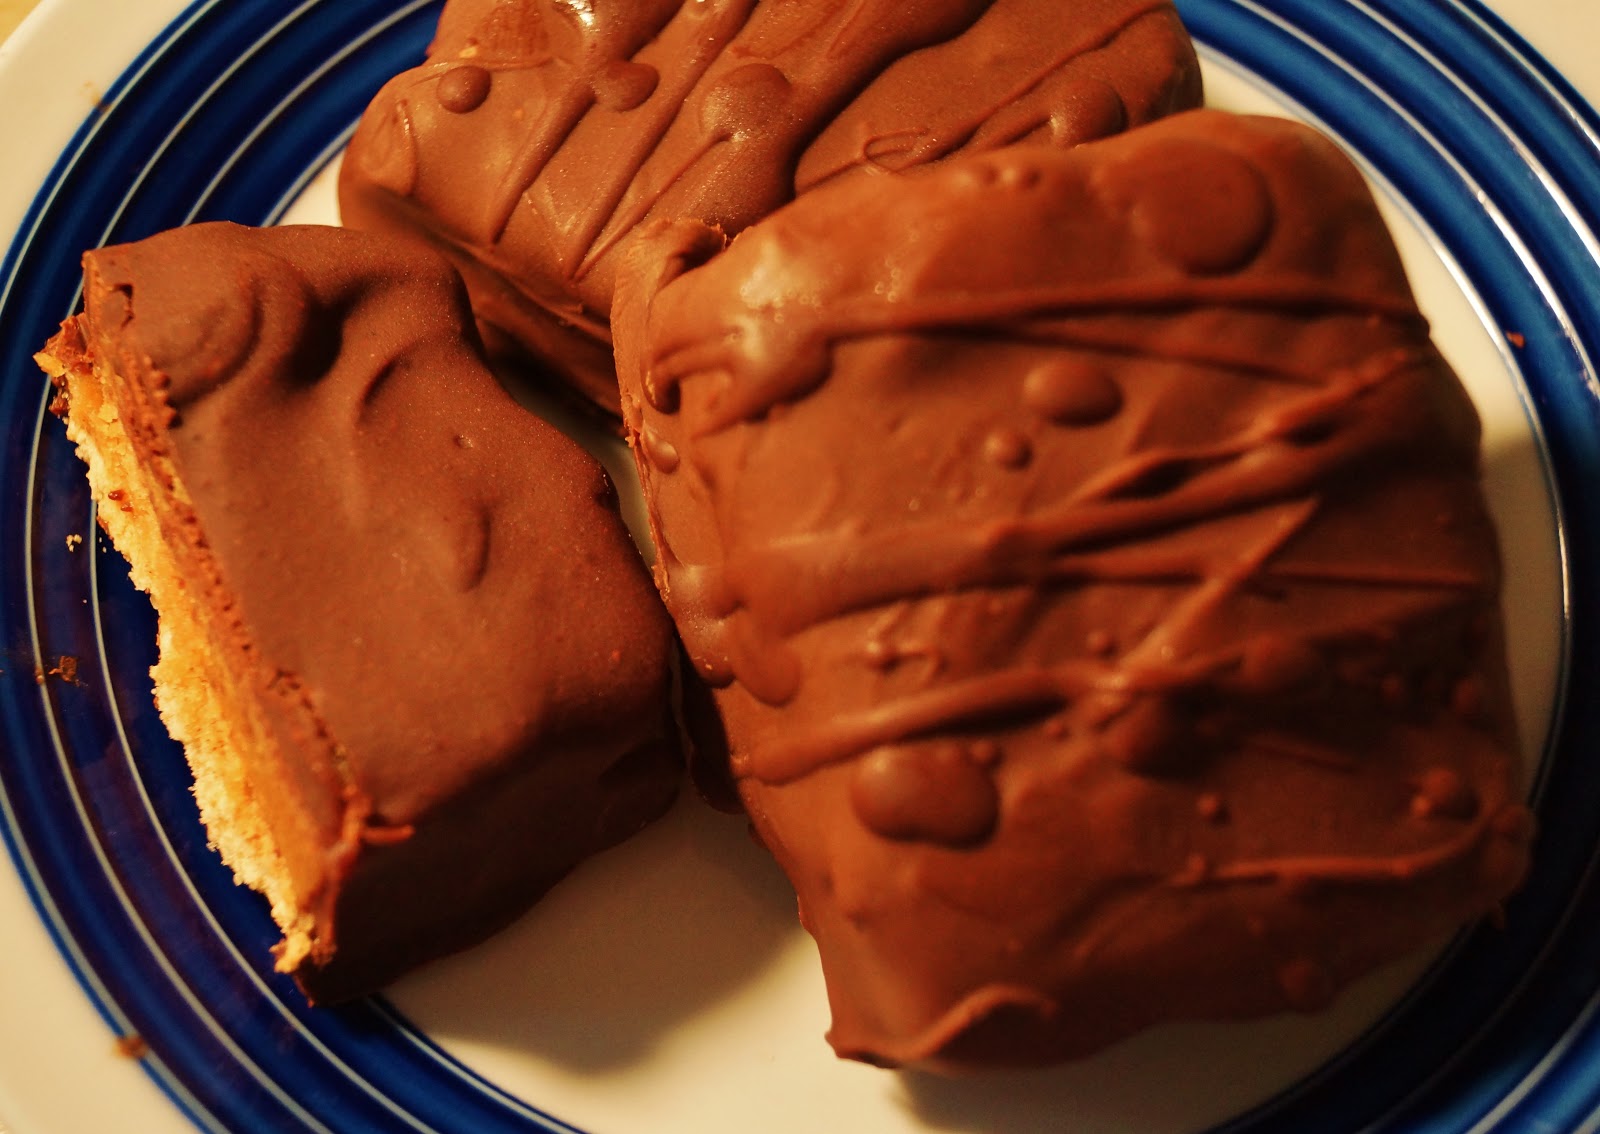
However, there was a time where these little sandwiches were the go-to treat.  Creamy, chocolaty, and kept cold (even frozen!), they were like a peanut butter ice cream sandwich and a slice of heaven on a hot summer day.  Their taste, retro feel, and former "must have" designation has elevated them almost to mythic cult status with Disney snackers...  So much so that when they were brought back for 3 days (that's right, they were randomly available for 3 days), I saw Twitter forwards like you wouldn't believe when they'd been spotted and people giving running updates as to their availability.  Honestly, it was crazy.  I've never seen a snack inspire such frenzy in people.

As a result of what I think is the most viral Disney Twitter explosion not involving the new Fantasyland that I know I'd ever seen, I reached out to one of my connections to get some more info about this treat.  What I came back with was the recipe, direct from one of the folks who used to actually make it back in the mid 90s.  According to him, the snack was good and enjoyed by many, but people complained that it'd melt too quickly and was way, way too messy to really enjoy.  Then, as luck would have it, at the place on property where this treat was exclusively available at the time (which I'm not going to name because I don't want to get anybody in trouble for sharing the story with me...), in one of their displays that is refrigerated, they had some extra space and they decided to slide a few of these bad boys in the refrigerated case.  From there, the iconic chocolate peanut butter sandwich as it was known was born and became a sensation, eventually becoming available at several places throughout Disney.

Nobody really knows why these were phased out...  They were time consuming to make and difficult to store, but more importantly they were served in conjunction with a sponsorship with a peanut butter company that has long since expired which may have been the nail in the coffin to this delicious treat. 

I'd have to agree that, while making these is easy, it certainly is time consuming and requires a lot of space, both on the counter and in the fridge.  If you've got both of those issues worked out, then you've got a hit on your hands with this recipe. 

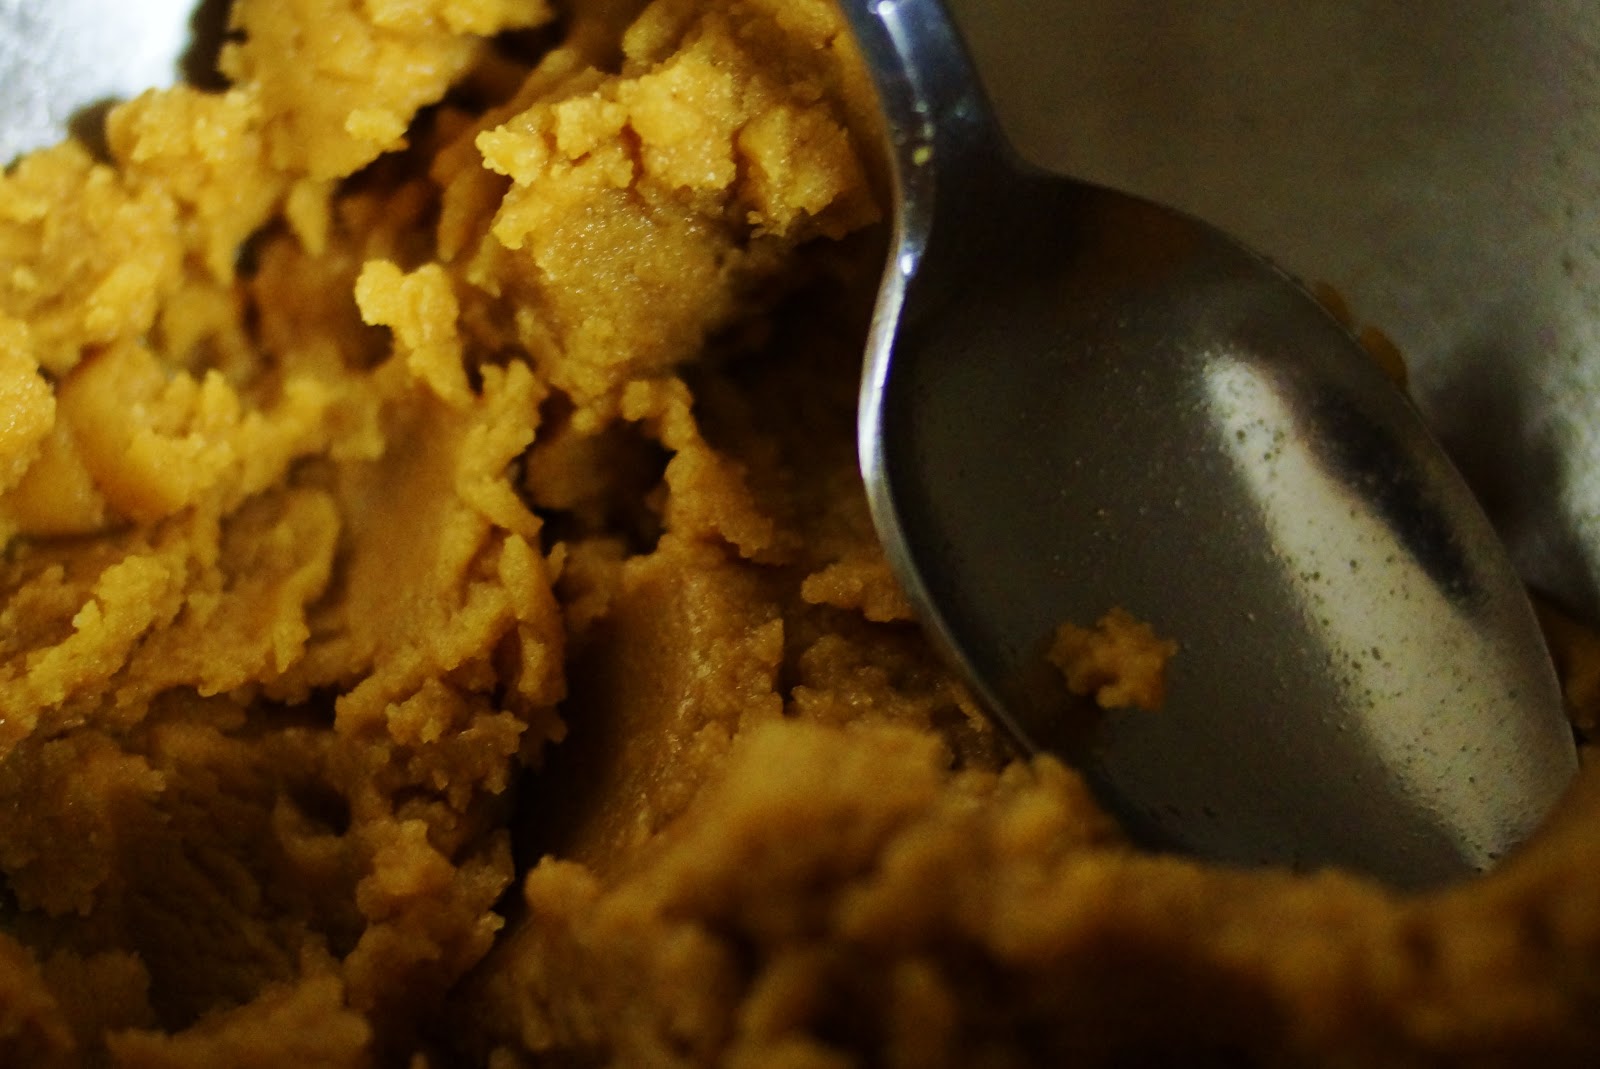
I served this as is, making no real changes at all.  The only thing is that I don't have the fancy-pants molds that they have at Disney, so I quite literally spooned the mixture on the cracker and then molded it with my hands to a square, level shape.  It's not messy or sticky, so I really didn't mind getting hands-on with the peanut butter mixture.  I'll also say that I went with a combination of chocolates...  I did half of the bars with milk chocolate and a dark chocolate drizzle, the other half dark chocolate with dark chocolate (tempered with whipped cream) drizzle.  Honestly, I hate working with milk chocolate because it's such a pain, so for those who don't do a lot of chocolate work, I'd suggest going with a dark or bittersweet and then adding whipped cream to reach a taste that you'd enjoy.  But if you're more confident working with milk chocolate without burning it or having it seize, then go for it.  Quality of chocolate really matters for this recipe, perhaps more then any other chocolate recipe I've used in awhile.  Don't go cheap or you'll regret it.  In fact, Disney has a contract with a certain chocolate company that they use for their chocolate work, a company that also has a store in Downtown Disney...  Again, can't say the name here because this recipe isn't featured at their establishment, but I have made some marvelous cookies for this blog that come from the same spot if you need a hint...  Anyway, they're expensive, but for sure the best way to go if you can find them in your grocery store.  


~~~~  °o°  ~~~~

Chocolate Peanut Butter Sandwiches
As was served at Main Street Bakery, Magic Kingdom, and Starring Rolls, former MGM Studios (now Hollywood Studios)
 
°o°  14-16 ounces high-quality milk chocolate (or 60% dark chocolate)
°o°  2 tablespoons butter flavored shortening, melted
°o°  6 graham crackers, halved

°o°  1 1/2 cup smooth peanut butter
°o°  4 ounces cream cheese
°o°  1/2 cup sugar
°o°  2 tablespoons butter, melted
 
Slowly melt the chocolate in a double boiler or in the microwave in increments of 30 seconds.  Be very sure, especially if using the milk chocolate, that no moisture gets into the chocolate (perhaps a microwave would be best for some to melt milk chocolate).  Add melted shortening and stir.  Dip the graham crackers into the melted chocolate and place on wax paper.  Place in fridge or freezer to allow to set.

In a bowl, combine peanut butter, cream cheese, sugar, and melted butter and beat until all ingredients are completely combined.  Allow to sit in a refrigerator for about 10 minutes.  

Remove graham crackers from fridge along with peanut butter mixture.  Top graham crackers with peanut butter, about 3/4 inch high, and patted into a flat, square shape (matching the graham cracker).  Return to fridge for about 10 minutes.

Re-melt the chocolate.  Remove peanut butter sandwiches from fridge and dip into the melted chocolate, being sure to cover all exposed areas of peanut butter.  (I would pour chocolate over the top of the square and allow it to flow down the sides.)  Return to waxed paper and refrigerate several hours or until firm.  Either store in covered containers in the fridge or wrap individually with waxed paper and freeze.
~~~~  °o°  ~~~~