This is obviously a recipe that missed the boat last week for Far East Week.  Featured once at Yakitori House, and featured in a similar form again at Katsura Grill at the Japan Pavilion in EPCOT, this hearty combination of soup and noodle dish is the perfect wintertime treat.  In fact, this is customarily served as an end-of-year celebration dish.  The version served at Disney is from the Osaka region, though somewhat tempered to American audience it serves...  In Osaka, just before the dish is served, a raw egg is cracked into the dish and tossed into the noodles before serving.  In Tokyo, the raw egg is served on the side and each bite is dipped into the egg before eating.  Yikes!  Needless to say, I went with preparing this the EPCOT way, sans raw egg wash.

There are a few things I did differently for this recipe...  First off, it calls for kombu dashi, or a form of fish and seaweed stock.  Being a fan of neither, I substituted this for chicken stock with an additional tablespoon or so of chicken base.  It sounds strong, and it is...  If you worry it's too strong, simple water with the base mixed in is fine, though the flavors in this dish are supposed to be strong.  Trust me, it's not as overwhelming as it sounds.  Secondly, the meat is supposed to be much, much, much thinner...  Almost paper thin.  I got the thin-sliced stir-fry beef instead because it was cheaper and I was in a hurry and didn't want to wait for the butcher to slice me the thin stuff I needed.  It obviously doesn't change the taste, but the texture does change pretty dramatically.  Having had the authentic stuff at Katsura Grill in January, I have to say I wish I'd gone with the thin, thin cut.  It makes for such a wonderful consistency.


This dish was a big, big hit.  Something I plan on adding to my regular menu...  It's fast and tasty and just the right amount of sweet and savory.  And hey!  I remembered the green onions this time!

~~~~  °o°  ~~~~

Sukiyaki
As is served at Katsura Grill, formally Yakitori House, Japan Pavilion, EPCOT
 
°o°  1 pound beef, sliced very thin
°o°  1 tablespoon oil
°o°  1 onion, sliced
°o°  1 bunch green onions, chopped
°o°  1/4 pound shredded carrot
°o°  2 packs udon, prepared according to package directions

Sukiyaki Sauce
°o°  1/4 cup soy sauce
°o°  1/4 cup mirin (sweet cooking wine)
°o°  1 cup dashi (fish stock, or chicken stock with added chicken base)

Dashi
°o°  1 cup water
°o°  1 inch square konbu (sea weed)
°o°  1/2 cup bonito flakes
  
To make dashi, add konbu to water and allow to soak for at least 2 hours.  Transfer to a saucepan and bring to a low boil over highest heat, boil for about 1 minute.  Remove from heat and add bonito flakes and allow to stand for 5 minutes.  Strain liquid into a bowl, removing all bonito and konbu, leaving just the liquid.

Combine all ingredients for sukiyaki sauce, set aside.  Heat a large pot and add oil.  Add beef slices and cook rapidly until almost done (the thinner the beef, the faster this process).  Add onion and carrot and cook for about 1 minute, then pour in sauce.  Lower heat and cover, allowing the vegetables to cook until desired doneness, about 7-10 minutes.  Traditionally, the vegetables are left fairly crunchy.  If cooked until soft, adding a little more water may be necessary.


~~~~  °o°  ~~~~


This recipe is so special, I'm seriously so excited to finally share it.  General Tso's chicken is one of my absolute favorite takeout Chinese food meals, right on up there with fried dumplings and wontons.  When I had it at Nine Dragons in EPCOT, it was pretty darn close to a religious experience...  It was easily the best I'd ever had.  When I went, it didn't even come with a side of broccoli which was awesome.  I always forget to ask them to leave it out, then when I get my meal I have to dissect it to get all traces of the stuff out, then it looks like I'm performing surgery instead of eating, and that's just plain awkward, especially at a nice place like Nine Dragons.

Now, I do have my own recipe for General Tso's that I've used for the better part of a decade.  A recipe that, after making this, I will never, ever use again.  It remains to be seen if the amazingness that is this recipe has turned me off from non-homemade General Tso's for all of eternity.  An exaggeration?  Not likely, this stuff is just that good.  It smells, tastes, and looks exactly like what I was served in 2008 and I was so happy with the final product that I think I took over 100 pictures of it.  What can I say?  Food inspires me.


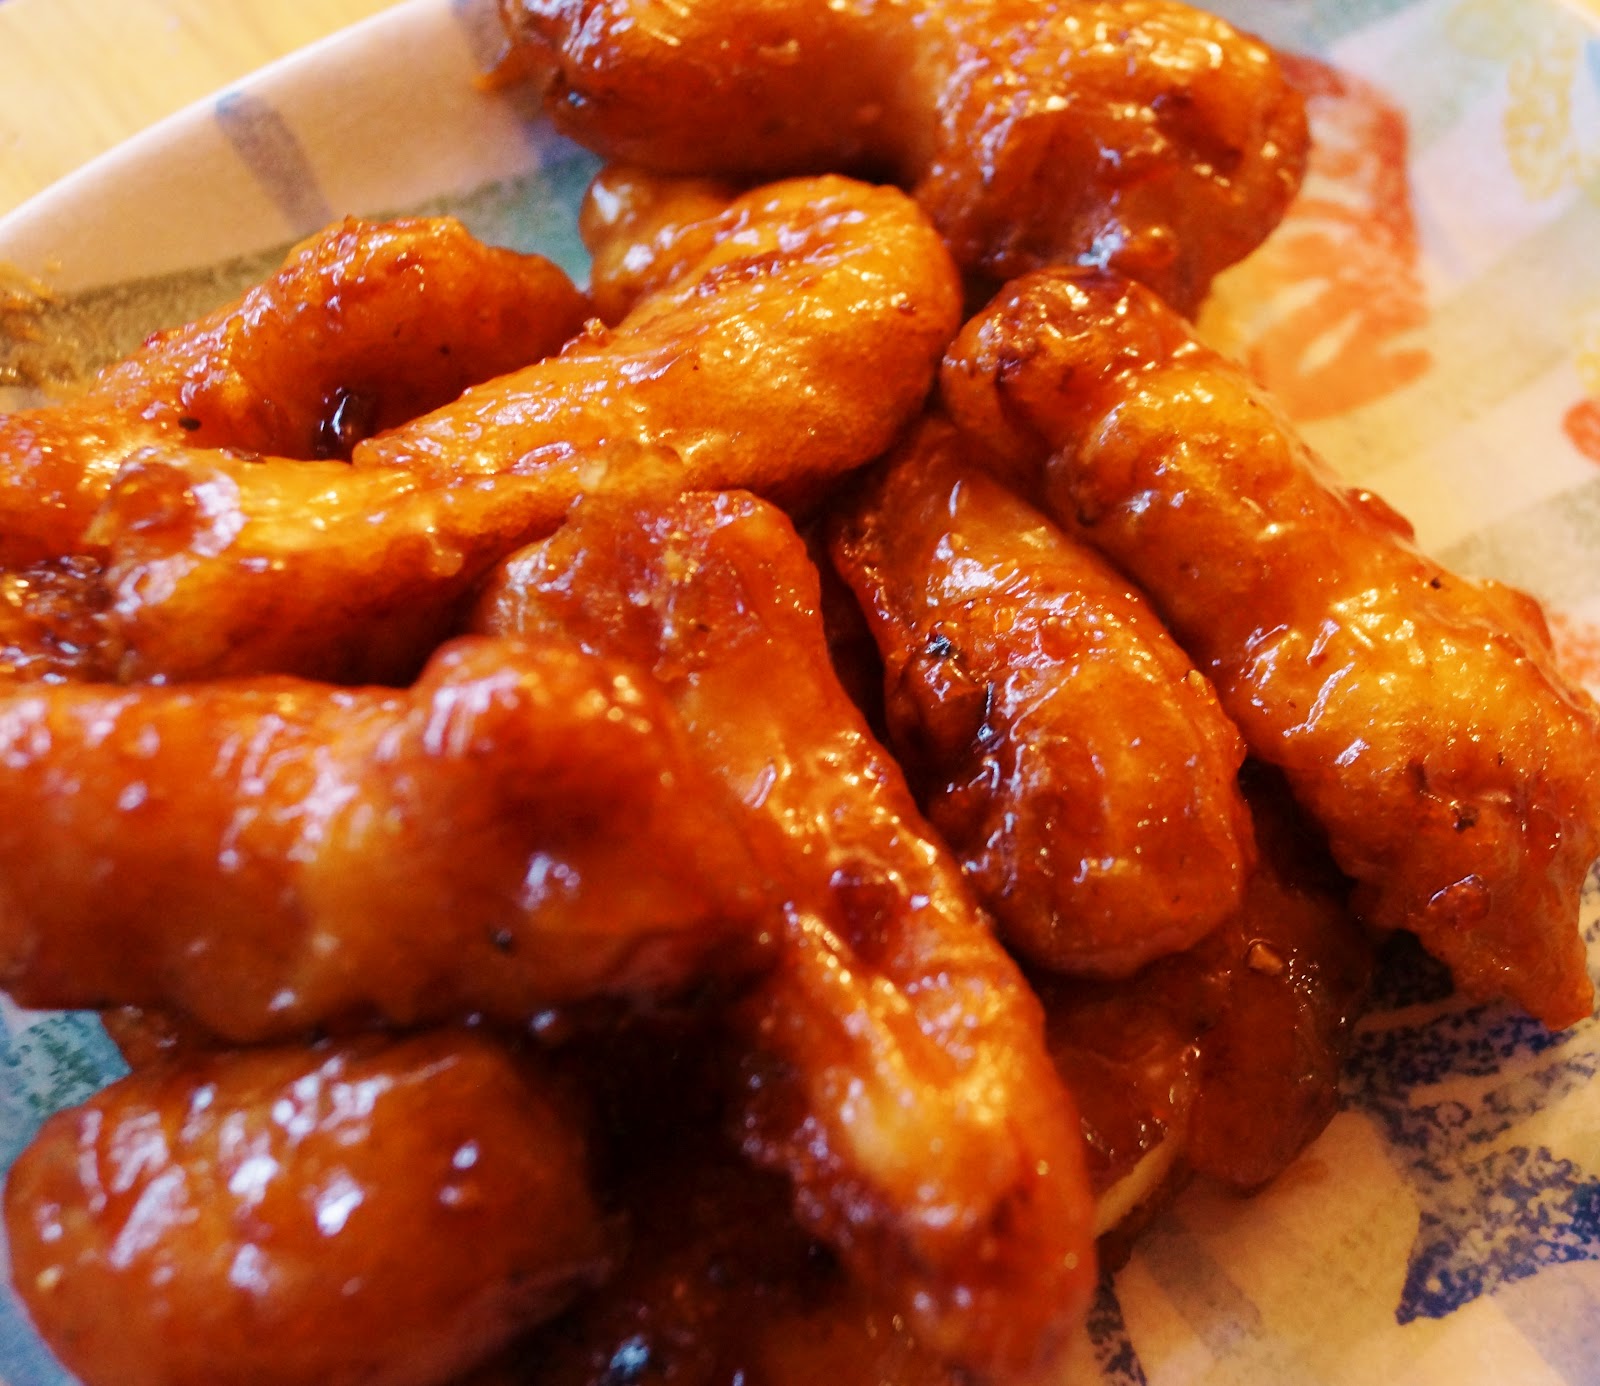
This recipe looks intimidating, but I promise, it's not that difficult.  The biggest leap of faith for me was the breading that goes on the chicken...  Even in my recipe, I've only ever used a dry batter.  This batter, however, is liquid.  I had convinced myself it wouldn't work, but had faith and went along with it anyway.  When I pulled out the first bit of chicken and it looked exactly like golden chicken fingers that you order at any Chinese place, I knew I'd stumbled upon greatness.  And best of all, I can save out some of the fingers, serve that to anybody who doesn't like the sweet spiciness of the General (like kids...), and I don't have to make a special meal or create more dishes!  Woo-hoo!

Without the sauce... YUM!
My big tips on this dish are to work fast, to leave your batter as thick as possible for a fluffier and crunchy crust, and to not fry the chicken for a moment longer then you have to.  The longer you fry it, the crunchier the outside gets, but the less fluffy and bready the inside gets.  For super crunchy chicken, add the sauce at the absolute last second before serving...  I did mine table side.  That allows the sauce to really coat everything, without the breading going soft and losing that delicious crunch.  I also went with thin-sliced chicken just to make sure that I wouldn't accidentally leave them underdone during the frying.

Of course you can serve this with rice and veges, which help cut down on the sweetness, but I personally think that takes up valuable space in my tummy and I go without.  I highly, highly suggest giving this dish a try...  It's amazing, to say the least.


~~~~  °o°  ~~~~

General Tso's Chicken
As is served at Nine Dragons, China Pavilion, EPCOT
 
°o°  10-12 ounces thin-cut chicken, cut into strips and/or chunks
°o°  oil for frying
 

Marinade
°o°  1 teaspoon chicken base
°o°  1/2 teaspoon white pepper (or more or less to taste)
°o°  1 teaspoon sugar (or more or less to taste)
°o°  1/2 teaspoon cooking wine 
°o°  1/2 teaspoon sesame oil

Batter 
°o°  3/4 cup all-purpose flour
°o°  1/4 cup cornstarch
°o°  1 heaping teaspoon baking powder
°o°  1 egg, beaten
°o°  2 tablespoons oil
°o°  1 cup water
°o°  Salt, to taste

Sauce
°o°  1 tablespoon soy sauce
°o°  2 teaspoons ketchup
°o°  5 tablespoons rice vinegar
°o°  5 tablespoons sugar
°o°  1/8 tablespoon black pepper
°o°  1/8 tablespoon chicken base
°o°  1 tablespoon corn starch
°o°  1 tablespoon vegetable oil

Combine all marinade ingredients and soak cubed chicken in marinade for at least 30 minutes or overnight.  

Meanwhile, combine all batter ingredients, stir very well (but do not beat) and set aside.  If mixture is too thick (it should be slightly thicker than waffle batter), add as little water as needed to thin it out.  Set aside batter mixture.  

Combine all sauce ingredients, mixing until completely blended and cornstarch is absorbed.  Set aside.

Pour cooking oil into a deep fryer or a large pot and heat to about 320.  Dip the marinated chicken a few pieces at a time into the batter, making sure that no pieces are stuck together and all parts of the chicken are completely covered in batter.  Drop carefully into oil and fry until golden and chicken is cooked (cooking time varies depending on size of chicken...  Test a piece for doneness to approximate cooking time if needed).  Drain on paper towels.  Keep warm.  Take care that the oil doesn't get too hot, cooking the outside before the chicken is done, or too cold, causing the batter to become oily.

After all chicken is fried, heat sauce until it boils, darkens, and thicken slightly.  Quickly add chicken and toss to coat.  Serve immediately.


~~~~  °o°  ~~~~
”Tip
Since starting the blog, for various reasons, I've often finished the week with extra, unpublished recipes.  In fact, now, I've got quite a backlog of them.  I've been sitting on them, some of them for awhile, in the hopes that somehow I can incorporate them...  And I think this is the perfect time to squeak them in

So, this week's theme?  Leftovers!  I'll be including dishes from Nine Dragons, Liberty Tree Tavern, Shutters, Yakitori House...  Maybe I'll sneak another surprise in there too. 

All of this clears the way for next week, which I have to say, I'm pretty psyched about.  It's going to be one, big party...  Because next week is my birthday!  Woo-hoo!  I'm totally ready to celebrate with some Disney dishes...

But first, let's clear out those leftovers!
Hurrah for my first recipe from the Food and Wine Festival! 

I was pretty on the fence about doing this recipe.  It calls for peanut butter and with two peanut allergies in the house, plus the fact that I can't remember the last time I've even had any peanut butter, I just didn't know how it'd work out.  I came this close to shelving the recipe all together.  But then I happened upon the history of dan dan noodles, and knowing how big of a sucker I am for recipes with a story, I had to make it.

Apparently dan dan noodles (or dandanmian) is a classic Sichuan dish that is sold by street vendors.  Because the dish is so easy and cheap to make, even the poorest of people could afford to make and sell the dish at a profit.  They'd carry in baskets, carried by a stick, or dandan, with the soup in one basket and the noodles in the other.  Literally translated, it means beggar's noodles. 

The dish has changed a lot and can vary wildly depending on where it's served.  In China, the noodles are frequently served in a very spicy broth with shaved pork on top.  In the US interpretation of the dish, it's traditionally served with no sauce, sometimes with curry paste instead of sesame paste, and is a lot less spicy.  It's also served either hot or cold.


The Food and Wine recipe is an interesting mix of American and Chinese influenced.  They prepare it with spice, so it has a zip, and sesame paste instead of curry paste.  However, they also serve it cool, with no sauce, and adding peanut butter or paste, which is very much the American interpretation of the dish.  I personally thought it was quite interesting to taste...  It certainly had quite unexpected flavors, not at all what I'm used to in a noodle dish.  Not being a fan of peanut butter, next time I'd leave it out and again double the amount of sauce used (I love my sauce), and I think that would make the dish perfect.  And, surprisingly, it wasn't bad at all served cold!  Maybe it's just me though, I still preferred it slightly while warmed.  And, again, I forgot to top it with green onions...  Which is probably for the best since my green onions were looking a little sad.  Believe it or not, the ingredients for this dish look exotic, but I was actually able to find all of them in a regular grocery store and can be purchased in relatively inexpensive sizes.

~~~~  °o°  ~~~~

Dan Dan Noodles
As is served at The Food and Wine Festival, China, EPCOT
 
°o°  8 ounces dan dan (lo mein) noodles
°o°  green onions, for garnish, optional

Sauce
°o°  1 teaspoon smooth peanut butter
°o°  1/2 teaspoon sesame paste
°o°  1/4 teaspoon sesame oil 
°o°  1 teaspoon soy sauce
°o°  1 teaspoon rice vinegar
°o°  sugar, to taste (about 1-2 teaspoons)
°o°  fresh ginger juice (or grated ginger), to taste (about 2 teaspoons)
°o°  1/4 teaspoon minced garlic
°o°  1/2 cube chicken bouillon
°o°  1 teaspoon chili oil
°o°  1 teaspoon Szechuan peppercorn oil

Cook the pasta in lightly salted water.  When done, drain the pasta, reserving about 1/2 cup of the water.  Set aside (using a small amount of sesame oil to toss the pasta, to prevent it from sticking, if desired...  Though I strongly suggest this).

Combine all ingredients for the sauce in the saucepan used for the noodles, adding the broth from the pasta.  Cook over medium heat until the sauce darkens and reduces, the chicken bouillon dissolves, and the peanut butter breaks up and both full incorporate into the sauce.  Pour over chilled noodles and toss until sauce coats all of the noodles evenly.
~~~~  °o°  ~~~~


I know that Nine Dragons isn't always listed on people's "to eat" list, but I can't help but have a soft spot for it.  The first and only time I ate there was in 2008, and while I keep meaning to go back, I've only managed to dine at the adjacent counter service since then.  I've always loved how they've managed to turn what most people think of as fast food cuisine and elevate it to something a little more special.

This is one of the dishes that was ordered when I dined there, and I can't believe I haven't made it before...  It is criminally easy to make, and it tastes outstanding.  While it is a little easier to make with a wok, you really don't need one.  Just be sure, if you're using a frying pan, that when it comes to the stir-frying, just keep everything moving.  The longest part of the recipe is cooking the meat and once that's done, the rest of it comes together very quickly.  So the goal is to cook it all quickly, evenly, and completely, without burning anything.  Also, be sure when you cook the meat to drain the excess marinade, otherwise the mixture will look very grainy and unappealing (though still taste fine).


The only real change I'd make to this recipe is, since I love a lot of sauce, I'd double the amount of sauce used.  While it did make enough sauce to cover everything, I really just love my food to swim in sauce!

~~~~  °o°  ~~~~

Canton Beef
As is served at Nine Dragons, China Pavilion, EPCOT
 

Marinade- 
°o°  8 tablespoons water 
°o°  1/2 teaspoon salt
°o°  1/2 teaspoon chicken base
°o°  1/2 teaspoon sugar
°o°  2 egg whites
°o°  2 teaspoons cornstarch

Sauce-
°o°  2 tablespoons soy sauce
°o°  2 teaspoons oyster sauce (optional)
°o°  2 teaspoons mirin (or wine)
°o°  2 teaspoons chicken stock
°o°  1 teaspoon chicken base
°o°  1 teaspoon sugar
°o°  white pepper, to taste
°o°  2 teaspoons cornstarch
°o°  1/4 teaspoon sesame oil

Beef Mixture-
°o°  1 pound beef flank steak, sliced
°o°  1 green pepper, cut into chunks 
°o°  1 red pepper, cut into chunks
°o°  1 small onion, cut into chunks
°o°  2 cups cooking oil

Combine all marinade ingredients and mix well.  Add beef and allow to marinated for at least 30 minutes or overnight.  Mix all sauce ingredients and set aside, allowing ingredients to infuse for 30 minutes or overnight.

Add cooking oil to warm wok or large frying pan.  Drain marinade from the beef, and add beef and cook on medium-high until almost cooked through.  Remove beef from heat, strain, and set aside.  Return about 1 teaspoon of oil to the wok, stir fry onions and peppers for about 30 seconds.  Pour sauce over vegetables and allow to cook, stirring occasionally with a spatula.  

When the sauce mixture begins to darken, put beef back in the mixture and stir fry quickly, until the beef is warmed, cooked through, and peppers are softened.  

Serve immediately with white rice.
~~~~  °o°  ~~~~


I know it may seem odd to start off the week with a sauce, or even really mention a sauce as a Disney recipe, but for me, I couldn't start off the week without sharing this specific recipe.


Back when I went to Disney last September, I was introduced to my new passion in Japanese culture.  Despite being to Disney numerous times before, the Japan Pavilion was a place I just really didn't stop at, but because I had a reservation at Teppan Edo, I poked around in Mitsukoshi, the huge, sprawling store, before it was time to be seated.  I fell in love with it and all the various gadgets, gizmos, and tidbits from around Japan.  Watching the cast members is always a blast too...  Most Disney employees seem to love their job, but at the Japan Pavilion, they bring Disney excitement to a whole new level.

That whole magical shopping experience fresh in my mind made Teppan Edo an even more fantastic dinner.  The ambiance was so amazing and gorgeous, right down to the bathrooms.  The chef was hypnotic to watch...  Unlike most hibachi chefs, who rely on showmanship and fun little tricks, our chef was meticulous, exact, and had a technique that was mesmerizing.  Every cut, precise and exact, his method was perfect, it was more like watching a meal prepared from the chef's table, as opposed to an exhibition.  Yes, the many other chefs there did the tricks everybody expects to see, the food flipped into a hat, onion volcanoes (though, granted, our chef did that too), and attempts to bounce food into people's mouths...  But I think it was fate that gave me the chef more fun to watch for technique and showmanship, because I walked out of that restaurant ready to learn all that there was to learn about Japanese cooking.

The food at Teppan Edo is prepared right and front of you and is surprisingly simple despite the amazing tastes and flavors, there meaning when I got home, there was very little in the way of recipes to recreate at home.  The only one that I could find was for the amazing ginger sauce that they serve as part of the sauce plate with the dinner.  I felt like I'd discovered gold when I found this recipe.  When I made it and served it with simple chicken and udon, I was in heaven.  It tastes exactly like as it's served there.


I will say, when it's served at Teppan Edo, it's strained so that the bits of onion and ginger that are used to season it don't float on the top of the sauce.  I personally prefer to leave it in.  The extremely strong flavors taste wonderful, and as the sauce ages, the flavor that infuses into it becomes only more and more rich.

~~~~  °o°  ~~~~

Ginger Sauce
As is served at Teppan Edo, Japan Pavilion, EPCOT
 
°o°  6 ounce onion, chopped
°o°  1 ounce ginger root, peeled and chopped
°o°  6 fluid ounce water
°o°  dash of parsley flakes
°o°  juice of 1/2 lemon
°o°  3 fluid ounces Soy Sauce 
°o°  1 fl ounce water
Combine all ingredients in a blender.  Puree at high speed until well blended.  Refrigerate overnight.

Strain sauce before serving.  Serve as a marinade or dressing for seafood or beef, or as a dipping sauce.
~~~~  °o°  ~~~~

Japanese and Chinese cuisine, believe it or not, is something that will forever be tied to my favorite food memories at Disney.  It was actually places like Teppan Edo, and the Mitsukoshi department store that fueled my fascination of Japanese culture and cooking, and it was places like Nine Dragons that showed me that Chinese food doesn't have to come in a white box. 

I know I've said it before, but my favorite pavilion along EPCOT's World Showcase is, in fact, the Japan Pavilion.  It was there, I discovered things like Pocky, Panda Cookies, Ramune, yuzu sake, bento-style cooking (more on that at the end of the month), and even took the plunge on sushi for the first time.  I've gotten everything from cookbooks to hair combs to chopsticks, sake, and lucky owls in my beloved Japan Pavilion.  Believe it or not, it was the Japan Pavilion that introduced me to Pokemon.  After all, it must be the work of magic to get a 30-something woman to invest more hours then she'd care to admit to into a children's video game franchise. 

So this week, I've decided to recreate some of Disney's most popular Japanese and Chinese dishes.  I honestly think Disney's Asian-style cusine is highly underrated, and I'm super excited to not only pay tribute to some of my absolute favorite places in all of Disney World, but to also share foods that I think most people largely overlook while at Disney.  In fact, it was a struggle to narrow down what recipes I was going to feature this week...  There is so much to choose from!


Can you see it?

Here it is, the first recipe in the "They Should Serve This at Disney" series.  Woo hoo!  Though it very nearly ended up in recipe bloopers...  When making it, I accidentally forgot to add 6 ounces of chocolate...  I don't know what I was thinking, obviously math just isn't my strong suit.  It was still entirely edible, just a little goopier than I'd have liked.  When I remade it correctly, it came out perfectly, though I forgot to take pictures.  Again.

Anyway, this week, I picked a somewhat unique and unconventional candy...  Coconut and lime icebox fudge.  The recipe is loosely based off of a recipe that was shared with me by a friend which I tweaked here and there.  The final product ended up being just about the most amazing fudge I've ever had.  


Now, icebox fudge is kind of a regional thing, so for those who're not quite familiar with what it is, allow me to explain.  Unlike most fudge, which is solid and sets up to a harder, though slightly creamy, melt-in-your-mouth candy that will not melt if left at room temperature, icebox fudge is best kept, and served, chilled.  The texture is much more creamy, without being runny, but if left at room temperature it will not keep its shape.  In the 30 seconds of research I did on the subject, I found that icebox fudge really became the in vogue treat back in the era when electric refrigerators that didn't require defrosting were becoming a common household appliance.  The American housewife would use icebox fudge as a treat during the ever-so-popular cocktail, appetizer, or "finger food" parties as a subtle way to show off to her guests that she owned one of these fantastic new devices, as traditional iceboxes that required defrosting were too moist and would not allow icebox fudge to set properly.  The original recipe for icebox fudge actually came from a recipe book devoted to cooking using only your fridge and because finger foods were all the rage, this chilled chocolate was the very modern finger food-friendly substitute to ice cream and was quite popular for awhile in the south.

Now, I think this sweet fudge is a wonderful addition to the dessert menu of the more tropical bakeries and candy shops at Disney, maybe even dressed up as a full dessert (or as part of a dessert sampler) at places like Shutters and Coral Reef.  I can see it being served somewhere on the Boardwalk as its really sweet and refreshing taste just screams summertime at someplace tropical and relaxing.  It really is quite addicting.


I did fully intend on preparing this fudge in a 8x8 square baking dish, but as you can see, I used a rather large loaf pan.  I actually forgot that my only square baking dish met with an unfortunate, gravity-related accident and this was the best substitute I could find.  I fully suggest that, for best results, a 8x8 pan should be used, though keep in mind that the fudge will not be as thick as what I'm showing.  I actually think that thinner fudge bites actually tastes a little better as the big bites has a sweetness factor that is somewhat overwhelming for some.  For those who end up using the loaf pan, as I did, just be aware you won't use all of the graham cracker crumbs.  I should also say, I really like the crust super thick, first of all because it's delicious, but also because it provides an interesting texture and contrast to the sweet fudge.    

So what do we think?  Good enough to be served at Disney, or is it best left back in the 50's?

And for those who're still scratching their heads as to how fudge made in the fridge could have possibly been a poshy-posh treat to impress people with your fantastic fridge...  I actually have a cookbook from the 80's that shared recipes that highlighted another increasingly popular appliance...  The microwave.  Included is a recipe for cooking a Thanksgiving turkey.  Not how to reheat a cooked turkey, but how to clean, stuff, tie, and microwave a small, raw bird until it is cooked through.  Other gems include cooking a ham, hamburgers, roaster chickens, meatloaf, and pork chops, even a cake, all using just the microwave.  Apparently the need to impress people with our appliances has spanned decades, though I have to say if somebody presents me with a microwave-cooked turkey, I'll pass.

~~~~  °o°  ~~~~

Coconut and Lime Icebox Fudge
Original recipe by The Disney Chef
 
°o°  1/3 cup butter

°o°  1/4 cup sugar
°o°  1/4 cup shredded coconut
°o°  1 1/4 cup graham cracker crumbs
°o°  18 oz white chocolate
°o°  1 can (14 oz) sweetened condensed milk
°o°  1/8 cup coconut milk
°o°  1 tablespoon lime zest
°o°  1/4 cup lime juice
°o°  1/8 cup shredded coconut, roughly chopped

Line a 8x8-inc pan with foil or parchment, leaving an overhang off of the edges (to help remove fudge later).  Butter sides and bottom of the pan well.  Set aside.

Melt the butter and add sugar, and pour into the graham cracker crumbs and 1/4 cup shredded coconut.  Toss to mix all ingredients well.  Spread thickly, but evenly, into pan and cook 7-10 minutes, or until edges are lightly browned and the crust has dried.

Melt the white chocolate, sweetened condensed milk, and coconut milk over a double boiler until chocolate has melted completely.  Remove from heat and add zest, lime juice, and coconut.  Spread mixture evenly over the graham cracker crust.  Cover and chill overnight.

To serve, lift fudge from the pan using the foil/parchment overhang and cut into small, 1-inch squares.  Serve chilled and store in the fridge.
~~~~  °o°  ~~~~